Categories
AI/ML IoT

How I Built a Connected Artificial Nose (and How You Can Too!)

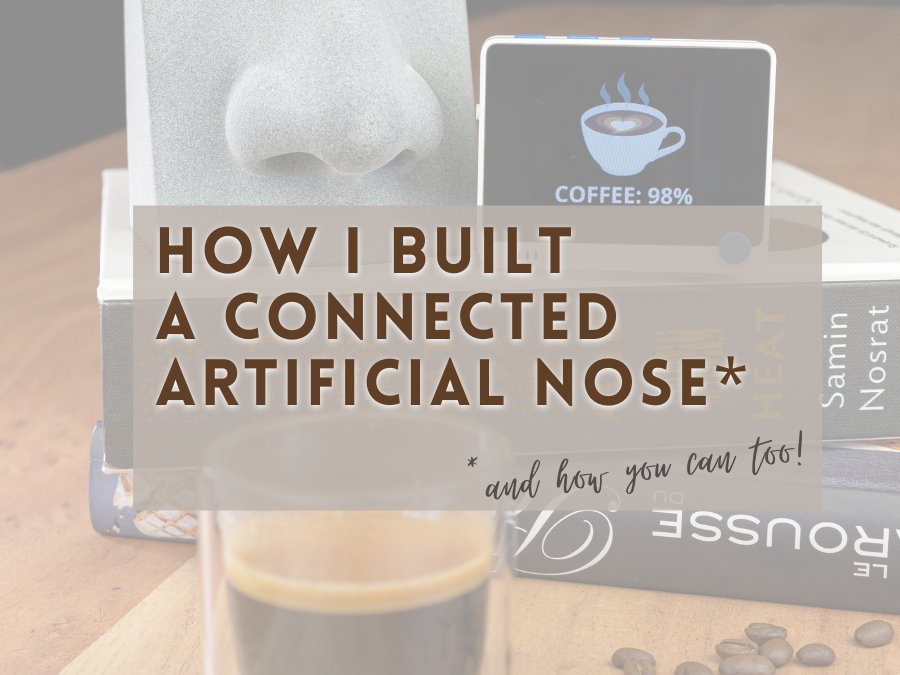
Over the past few months, I have worked on a pretty cool project that some of you might have already heard about as it sort of went viral. I built a DIY, general-purpose, artificial nose that can smell virtually anything you teach it to recognize!

The artificial nose in action, smelling coffee ☕ and whiskey 🥃.
SeeedStudio’s Multichannel Gas Sensor v2.

It is powered by the Wio Terminal (an Arduino-compatible prototyping platform), a super affordable electronic gas sensor, and a TinyML neural network that I trained using the free online tool Edge Impulse.

Cover of Make: Magazine Vol. 77.

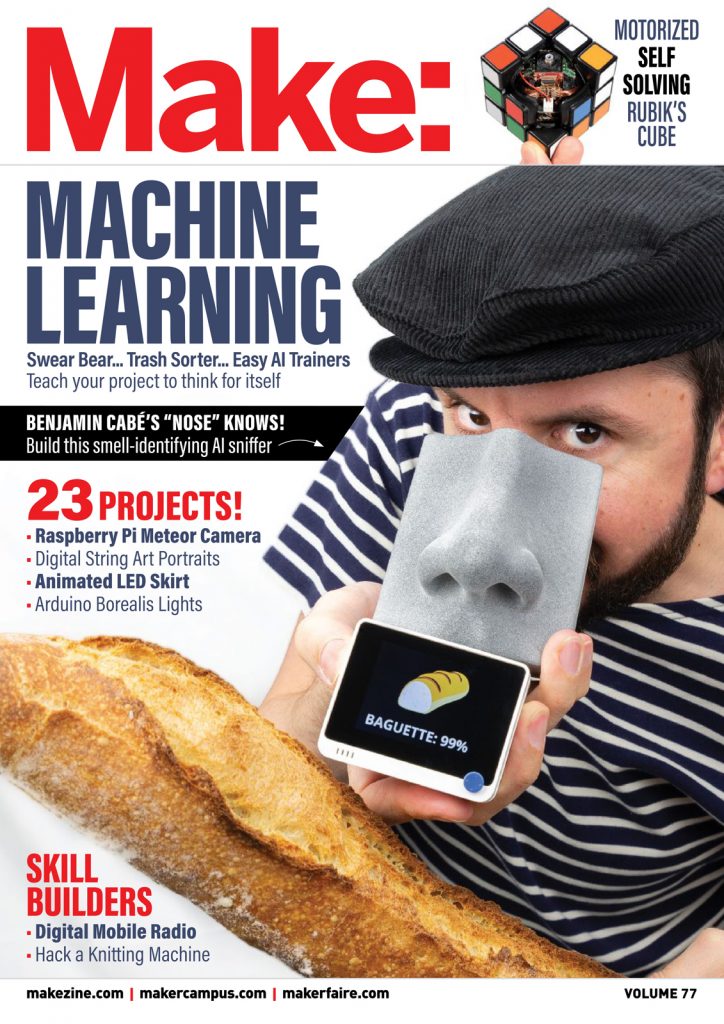
The project was recently featured on the cover of Make: Magazine, and I encourage you to check out the article I wrote for them before reading further.

The Make: Magazine article covers a lot about how you can build the artificial nose for yourself, so I want to use this blog post to dive deeper into why this project is so important to me. In particular, I want to share with you how it helped me understand more about AI than I’d ever thought, and how I eventually ended up connecting the “nose” to an IoT platform (namely, Azure IoT).

[toc heading_levels=”1,2,3″]

Making Neural Networks Tangible

Despite being passionate about all things software, Machine Learning (ML) has always been a field that’s eluded me, perhaps because it tends to be too abstract and too much maths for my visual brain?

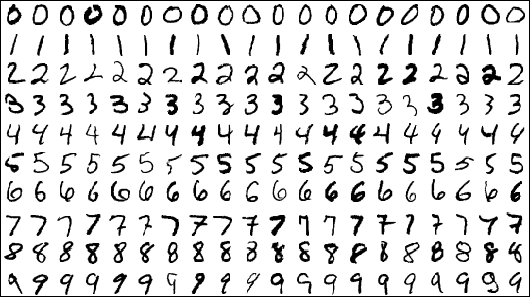
Sample images from the MNIST test dataset.

Speaking of visual things, every time I have tried to open a book promising to be an introduction to ML, most of the introductory examples involved image classification (ex. automatically recognizing handwritten digits from the MNIST database). And, sadly, those innocent pixels would be anything but visual to me, as they would quickly turn into abstract matrices.

So when I started to think of implementing an artificial nose, I didn’t initially approach it as a Machine Learning problem. Instead, I tried to use my intuition: “What characterizes a smell?”. And my intuition was telling me that somehow I needed to establish a correlation between the concentration of the various gasses measured by the gas sensor (carbon monoxide, ethyl alcohol, etc.), and the associated smell. However, doing a simple read of the gasses concentration at a given point in time would probably not cut it: how would it make the difference between a really strong alcohol smell, and one that was maybe more volatile?

Quickly, I realized that acquiring a couple seconds of sensor data would probably be just enough to “capture” the olfactory fingerprint of each smell. With these few seconds of sensor data, I could look at the variation (min, max, average, etc.) of the concentration of each gas, and this would hopefully characterize each smell.

It turns out that once I had extracted those characteristics—something that I can now refer to as feature extraction, like the AI grown-ups, and which was really easy to do using the Edge Impulse tool suite—all that was left was to effectively establish the correlation between them and the expected smells. However, I didn’t really know what kind of neural network architecture I would need, let alone what a neural network was anyway. So, once again, I leveraged the Edge Impulse environment.

It turns out the kind of classification problem I was looking at was reasonably simple: given the minimum/maximum/average/… concentration of each gas on a given time period (I found 1.5s to be the sweet spot), what is the predicted smell? And one simple way to “solve” that equation, is to use a so-called fully-connected neural network, like you see below.

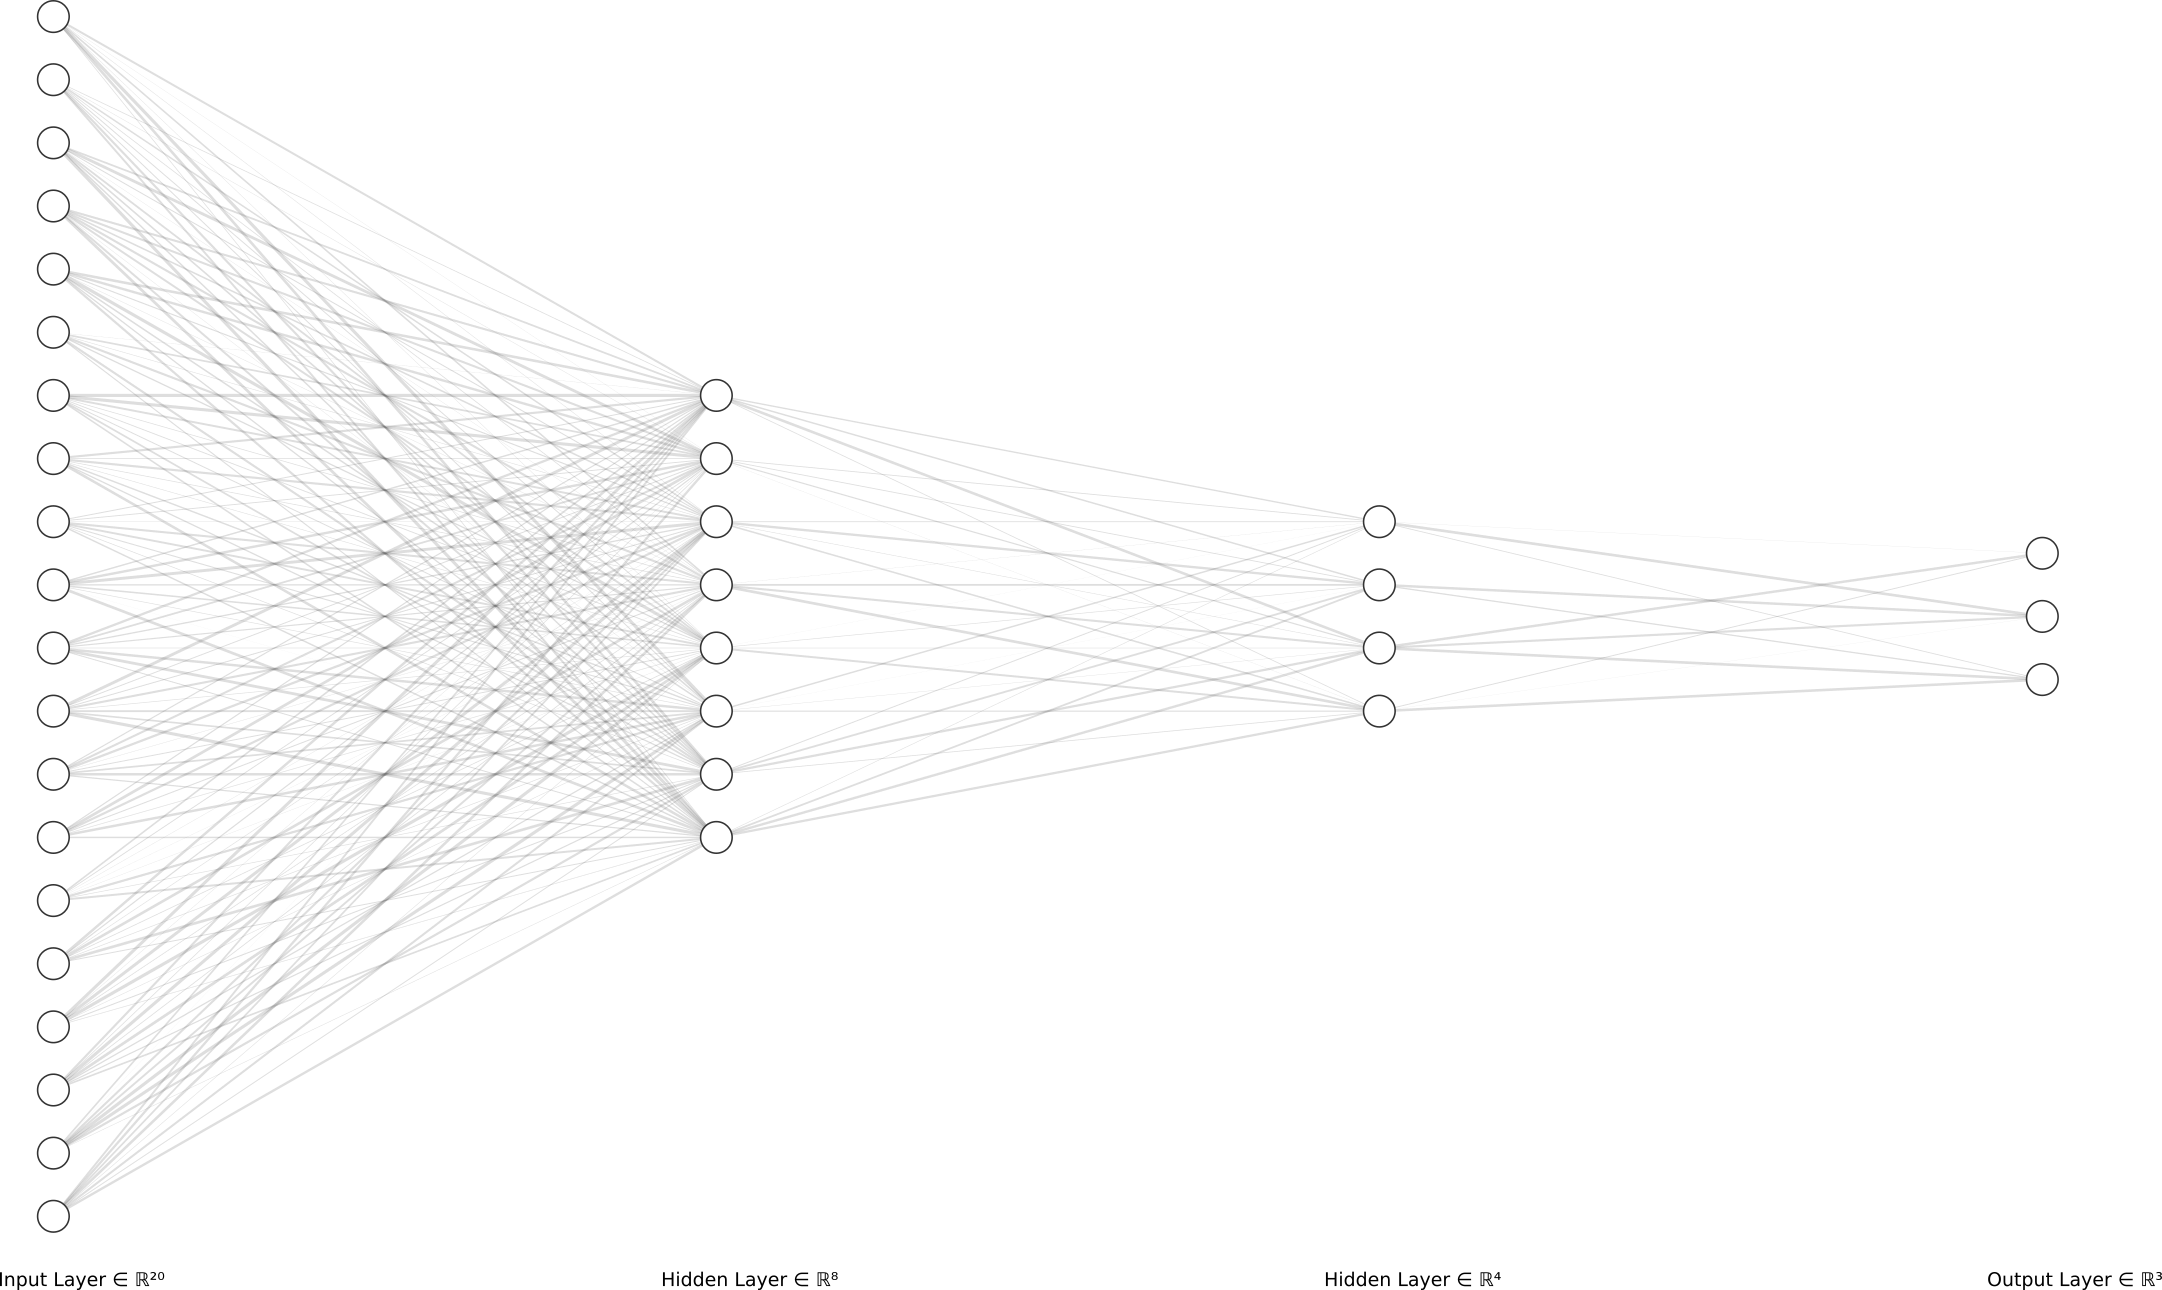
During the training phase, the training data represents the ground truth (ex. “This is 100% coffee!”) and is used to tweak the parameters of the equation—the weights of the neurons—based on how much each characteristic (ex. the average concentration of NO2) accrues to each smell.

Once the model has been trained, and during the inference phase, a given input/olfactory fingerprint entering the network (left-hand side of the diagram), ends up being “routed” to the appropriate output bucket (right-hand side). effectively giving a prediction about what smell it corresponds to.

Building an actual nose

When I initially shared my project on social media back in May last year, I quickly realized lots of people were interested in it.

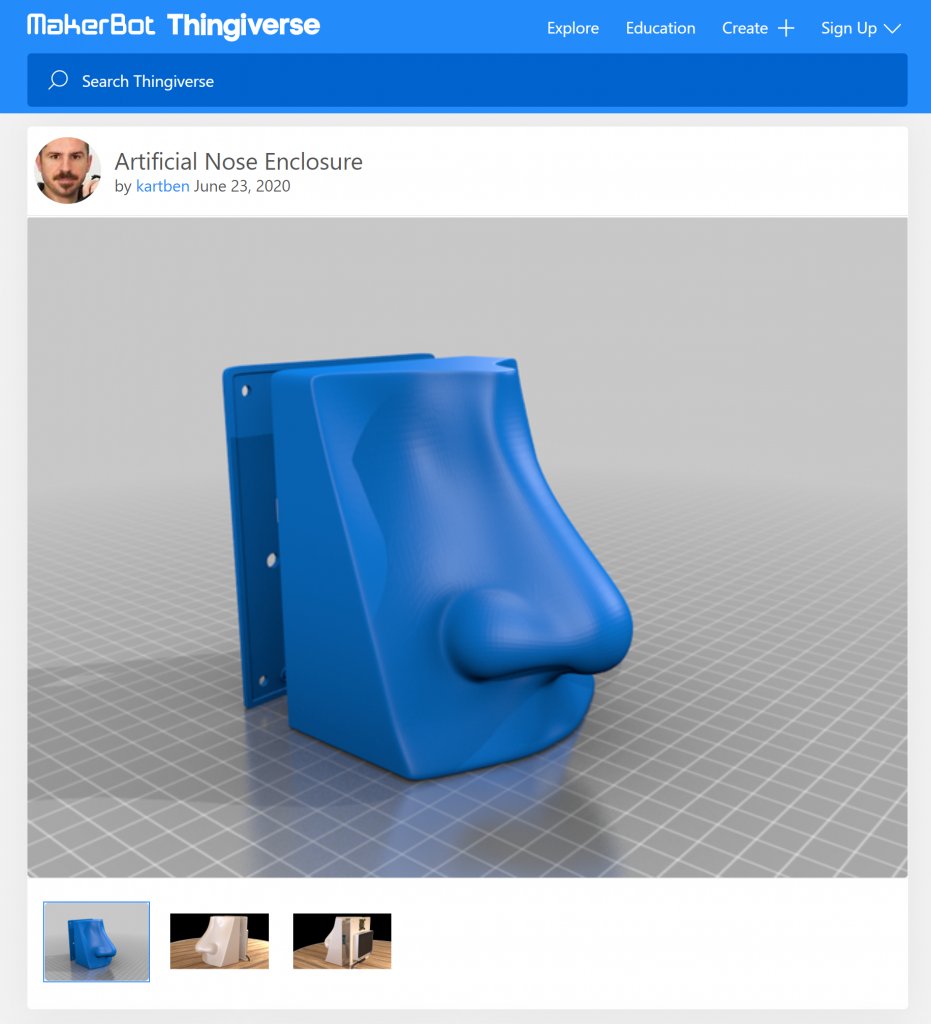
This motivated me to go further and to turn my initial prototype into an actual nose! I had never done that before, so I ended up teaching myself how to use 3D CAD software so that I could design an actual enclosure for my device. I picked Blender—which I would not recommend for pure CAD stuff as there are better alternatives out there, ex. TinkerCAD—, and 3D-printed the resulting plastic enclosure.

A screen capture from the thingiverse.com website titled "Artificial Nose Enclosure" that show a blue 3D rendering of a nose.
The Nose Enclosure on Thingiverse.

Turning the nose into an IoT device

An interesting aspect of TinyML is that it enables scenarios where your low-power, constrained, microcontroller-based equipment is completely autonomous when it comes to performing machine learning inference (ex. guessing a smell). It is very powerful, as it means your sensor data never has to leave your device and you don’t need to rely on any sort of cloud-based AI service. But on the other hand, it also means that your smart device might not be so smart if it ends up living in its own echo chamber, right?

At the heart of an IoT solution is often the “thing” itself, and it makes a lot of sense to design it to be as smart as possible for there are many reasons why relying on any form of network communication or cloud-based processing is at best impractical, sometimes plain impossible.

Connecting the Artificial Nose to Azure IoT Central

The Artificial Nose is effectively an IoT Plug and Play device.

As soon I was happy with how it performed at smelling things, and once I had completed the development of the graphical user interface, I did use the Azure IoT SDK (and some of the work I had done last year) to enable the nose to talk to the Azure IoT services.

It means you can very easily connect the device to Azure IoT Central (using the Wio Terminal’s Wi-Fi module), and get access to gas sensor data telemetry in near-realtime, see what the device is smelling, etc.

More importantly, you can automatically trigger rules when, for example, a bad smell is being detected, therefore allowing the nose to be much smarter than if it were just a standalone, offline, device.

Connecting the Artificial Nose to Azure IoT Central – Real-time telemetry.

If you built the artificial nose for yourself—and I hope many of you will consider doing so!—here are the simple steps for you to connect it to Azure IoT Central:

  • First, make sure that your Wio Terminal is running an up-to-date WiFi firmware by following these instructions ;
  • Create a new Azure IoT Central application (if you already have one you want to use, that works too!) ;
    • In the Administration section of the IoT Central application, look for the Device Connection menu.
    • Open the SAS-IoT-Devices enrollment group and take note of the following credentials that you will need to connect your AI nose(s):
      • ID Scope
      • SAS Primary Key
  • Flash the Wio Terminal with the latest Artificial Nose firmware (or deploy your own custom build) ;
  • While the Wio Terminal is powered, keep the three buttons (A, B, C) at the top pressed, and slide the reset button. The device should now be showing a black screen ;
  • Connect to the Wio Terminal over serial and check that it’s running the configuration prompt by typing help, which should show you the list of supported commands. Type the following commands to configure the WiFi connection and the Azure IoT credentials
    • set_wifissid <your_wifi_ssid>
    • set_wifipwd <your_wifi_password>
    • set_az_iotc <id_scope> <sas_primary_key> <device_id> (id_scope and sas_primary_key as per earlier, and device_id being the ID you want to give your device in Azure IoT Central)
  • Reset the Wio Terminal, and voila! You should now see a new device popping up in the Devices section of your IoT Central application.

Digital Twins meet virtual senses

Like I mentioned above, having the nose talking to an IoT platform enables scenarios where e.g. you trigger an alert when a bad smell is being picked up. But what is a bad smell anyway? This might depend on a lot of different factors, just like the final destination for the actual alert might be highly dynamic.

Let me try to illustrate this with an example of a real estate cleaning company in charge of buildings all around the city of Chicago. Their information system already allows them to keep track of their personnel and associated cleaning schedules, but in a pretty static way: cleaning people are going to their assigned location once a day, no matter what. From time to time, it turns out that the location doesn’t really require urgent cleaning (hello, COVID-19 and slow office spaces!), in which case the cleaning staff would have been better off going to a place that actually required servicing.

Beyond the apparent buzzword, the concept of Digital Twins consists in nothing more than augmenting the information system (staff directory, building inventory, cleaning schedules, etc.) and overall knowledge graph of the cleaning company with entities that correspond to physical, connected, assets.

With that in mind, a mere “it doesn’t smell so good in here” signal sent by a sniffing device sitting in an office building can immediately be contextualized, and appropriate actions can be taken. Based on where the device is effectively located, it becomes easy to figure out who is the person responsible for cleaning that space on that particular day, and to notify them accordingly.

Connecting the Artificial Nose to a Digital Twins environment.

Get started today!

Many people have already started to build the device for themselves and to experiment what adding “virtual smell” to their devices and applications could mean. If this blog post inspired you to join them, I will leave you with the only two links that you really need to get started:

TinyML powered Artificial Nose Project kit with Wio Terminal
Dark Mode

artificial-nose (this link opens in a new window) by kartben (this link opens in a new window)

Instructions, source code, and misc. resources needed for building a Tiny ML-powered artificial nose.

If you enjoyed this article, don’t forget to subscribe to this blog to be notified of upcoming publications! And of course, you can also always find me on Twitter and Mastodon.

Categories
IoT

Top 5 VS Code Extensions for IoT Developers

In just a few years, Visual Studio Code has conquered the hearts of a wide variety of developers. It took off very quickly in the web development communities, but it has now also become the IDE of choice for Java, Python, or C/C++ developers as well, whether they run Linux, MacOS, or Windows. In fact, in Stack Overflow’s most recent developer survey, VS Code is ranked at over 50% market share among the 90,000+ developers who responded.

Whether you’re just getting into IoT or whether you’ve been working on IoT solutions for some time already, you’ve probably realized that “full-stack developer” is a term that also often applies to IoT. You may very well be spending most of your days working on developing and testing the firmware of your connected embedded device in C. Still, once in a while, you may want to tune some Python scripts used for you build system, or use a command-line tool to check that your IoT backend services are up and running.

Rather than having to switch from one development environment or command line terminal to the other, I wouldn’t be surprised if, just like me, you’d be interested in doing most of your work without ever leaving your IDE.

In this article, we look at some essential VS Code extensions that will help you become a more productive IoT developer.

VS Code extension for Arduino

It’s been a very long time since I last opened the Arduino IDE on my computer. It is a great tool, especially for helping newcomers get started with the Arduino ecosystem, but it is lacking some key features for anyone interested in doing more than just blinking an LED or running basic programs. And now that more and more platforms are compatible with Arduino, from RISC-V developer kits such as HiFive1, to ESP32 or STM32 Nucleo family, there are even more reasons for looking for a better IDE for Arduino development.

The VS Code extension for Arduino is built on top of the official Arduino IDE—which you need to install once but will probably never open ever again—and provides you with all the features you’d expect to find in the classic IDE (e.g. browsing code samples or monitor your serial port).

The VS Code extension for Arduino in action.

What makes the extension particularly powerful in my opinion, is the fact it builds on top of the VS Code C/C++ tools to provide you with full-blown Intellisense and code navigation for your code, which proves to be very useful

I vividly remember the first time I put my hands on and soldered an Arduino-compatible board, circa 2010, at the TechShop Menlo Park. It’s been incredible to see the Arduino ecosystem grow over the years. Equally incredible is to think that until very recently, debugging a so-called sketch was reserved for the most adventurous programmers. If there was only one reason for you to try out the VS Code extension for Arduino, it has to be the fact it makes debugging Arduino programs so much easier (no more ‘Serial.println’ traces, yay!).

Behind the scenes, the extension leverages common debug interfaces such as CMSIS-DAP, JLink, and ST-Link. If your device already has an onboard debugging chip implementing one of these interfaces, you’re all set! If not, you will simply need to look at using an external connector that’s compatible with your chip.


PlatformIO IDE

Like I mentioned in the previous section, there are more and more platforms that tap into the Arduino paradigm, but there is, of course, more to embedded development than the Arduino ecosystem.

PlatformIO.org logo

PlatformIO originated as an open-source command-line tool to support IoT and embedded developers by providing a uniform mechanism for toolchain provisioning, library management, debugging, etc. It quickly evolved to integrate tightly with VS Code, and the PlatformIO IDE extension for VS Code is now one of the most popular ones on the Visual Studio Marketplace.

PlatformIO supports 30+ platforms (ex. Atmel AVR, Atmel SAM, ESP-32 and 8266, Kendryte K210, Freescale Kinetis, etc. ), 20+ frameworks (Arduino, ESP-IDF, Arm Mbed, Zephyr, …) and over 750 different boards! For each of these platforms, the extension will help you write your code (code completion, code navigation), manage your dependencies, build and debug, and interact with your device using the serial port monitor.

Another interesting feature is the ability to convert an existing Arduino project to the PlatformIO format, essentially making it much easier to share with your coworkers (and the world!), since it can then leverage PlatformIO’s advanced library management features. For example, it can automatically pull your 3rd party libraries solely based on the header files you’re including in your code.  


Azure IoT Tools

The Azure IoT Tools extension for VS Code is essentially an extension bundle that installs in one single click the Azure IoT Hub Toolkit, the IoT Edge extension, and the Device Workbench.

Azure IoT

As you look at connecting your devices to the cloud, Azure IoT Hub provides you with all you need to manage your devices, collect their telemetry and route it to consuming services, and more. Using the Azure IoT Hub extension, you can easily provision an IoT Hub instance in your Azure subscription, provision your devices, monitor the data they are sending, etc. all without having to leave your IDE!

If you are interested in using a container-based architecture for making your IoT gateways smart, chances are IoT Edge can help you! Thanks to the dedicated extension, you can easily build your custom IoT Edge modules, and deploy them to your edge devices connected to IoT Hub, either real ones or simulated ones running on your development machine.

Finally, the Device Workbench can help you get started very quickly with actual devices. It provides a set of tools to help with building your own IoT plug-and-play device, or simply to try out Azure IoT with an actual device, using one of the many examples bundled with the workbench.

What do I like the most with the Azure IoT Tools extension? Every few weeks, you get tons of awesome updates and new features, as the extension is actively developed.

By the way, if you don’t have an Azure subscription and want to get started with IoT on Azure, you can create a free trial account here!


Remote Development extension pack

IoT Development is much more than writing code for embedded devices. Frequently, you will find yourself in a situation where you want to interact with a folder that lives in a container on a remote edge gateway, or on a cloud server. You sure can use SSH and/or SCP to sync your local and remote development environments, but this can be pretty painful and error-prone.

The Remote Development extension pack allows you to open any folder in a container or on a remote machine and to then just use VS Code’s as if you were manipulating local resources.


REST Client

If you are like me, your go-to tool for testing REST APIs is probably Postman. It is indeed a great tool for creating and testing REST, SOAP, or GraphQL requests and it even allows you to save queries in the cloud and to share them with your colleagues. However, I recently found myself in a situation where I wanted to share some sample queries with people during a training session, and I didn’t want them to have to copy-paste unnecessarily from the training instructions to Postman; instead, I wanted the queries to be part of the actual training material!

The REST Client extension turns any file with an .http or .rest extension into an executable notebook, where you can very easily execute all the queries contained in it.

As you build an end-to-end IoT solution, it is more than likely that you will rely on 3rd party services along the way, and that you will interact with them using some form of REST API. For example, you may rely on a weather service as part of your predictive maintenance computations. Below is an example of how I shared with my students a few queries showing how to use the Azure Maps API to compute routes or render map tiles.

https://gist.github.com/kartben/deba6c69f6e506e94bc2a527badf1269

And now for the same queries (except for the subscription key which has been replaced by a real one 🙂) executed in real-time thanks to the REST Client extension:

How about you? Are there other VS Code extensions that you’ve found useful for your IoT projects? If so, I would love to hear about them in the comments.

You can also always find me on Twitter to continue the conversation.

Categories
Eclipse IoT

Eclipse Kura on Steroids with UPM and Eclipse OpenJ9

So it’s been a while since the last time I blogged about a cool IoT demo… Sorry about that! On the bright side, this post covers a couple projects that are really, really, neat so hopefully, this will help you forgive me for the wait! 🙃

UP Squared Grove IoT Development Kit

At the end of last year, a new high-performance IoT developer kit was announced. Built on top of the UP Squared board, it features an Intel Apollo lake x86-64 processor, plenty of GPIOs, two Ethernet interfaces, USB 3.0 ports, an Altera MAX 10 FPGA, and more. You can get the kit from Seeed Studio for USD 249.

The UP Squared Grove IoT Development Kit

Of course, it wouldn’t be a Grove kit without the Grove shield that can be attached on top of the board to simplify the connection to a wide variety of sensors and actuators (and there’s actually a few of them in the kit).

Running Eclipse Kura on the UP Squared board

Enough with the hardware! With all this horsepower, it is of course very tempting to run Eclipse Kura on this. The UP Squared being based on an Intel x86-64 processor, it is incredibly easy to start by replacing the default OpenJDK JVM by Eclipse OpenJ9. Here’s your two-step tutorial to get Eclipse OpenJ9 and Eclipse Kura running on your board:

In case you are wondering how much faster OpenJ9 is compared to OpenJDK or Oracle’s JVMs, here’s a quick comparison of the startup time of Eclipse Kura on the UP Squared:

Eclipse Kura start-up time on Intel UP Squared Grove kit

UPM

UPM logo

UPM is a set of libraries for interacting with sensors and actuators in a cross-platform, cross-OS, language-agnostic, way.

There are over 400 sensors & actuators supported in UPM. Virtually all the “DIY” sensors you can get from SeeedStudio, Adafruit, etc. are supported, but beyond that, UPM also provides support for a wide variety of industrial sensors.

Thanks to Eclipse Kura Wires and the underlying concept of “Drivers” and “Assets”, Kura provides a way to access physical assets in a generic way.

In the next section, we will see a proof-of-concept of UPM libraries being wrapped as Kura “drivers” in order to make it really simple to interact with the 400+ kind of sensors/actuators supported by UPM.

Integrating UPM in Kura Wires

UPM drivers are small native C/C++ libraries that expose bindings in several programming languages, including Java, and therefore calling UPM drivers from Kura is pretty simple.

The only thing you need is a few JARs for UPM itself (and for MRAA, the framework that is supporting it), the JARs for the driver(s) of the particular sensor(s) you want to use, and the associated native libraries (.so files) for the above. As you may know, OSGi makes it pretty easy to package native libraries that may go alongside Java/JNI libraries, so there is really no difficulty there.

In order for the UPM drivers to be accessible from Kura Wires, and to expose “channels” corresponding to the methods available on them, they need to be bundled as Kura Drivers. This is also a pretty straightforward task, and while I created the driver for only a few sensor types out of the 400+ supported in UPM, I am pretty confident that Kura drivers can be automatically generated from UPM drivers.

You can find the final result on my Github: https://github.com/kartben/org.intellabs.upm.

See it in action!

So what do we end up getting, and why should you care? Just check out the video below and see for yourself!