Categories
IoT

Connecting the Wio Terminal to Azure IoT

It’s been a few months now since I started playing with the Wio Terminal from Seeed Studio. It is a pretty complete device that can be used to power a wide range of IoT solutions—just look at its specifications!

Wio Terminal Features
  • Cortex-M4F running at 120MHz (can be overclocked to 200MHz) from Microchip (ATSAMD51P19) ;
  • 192 KB of RAM, 4MB of Flash ;
  • Wireless connectivity: WiFi 2.4 & 5 GHz  (802.11 a/b/g/n), BLE, BLE 5.0, powered by a Realtek RTL8720DN module ;
  • 2.4″ LCD screen, 320×240 pixels ;
  • microSD card reader ;
  • Built-in sensors and actuators: light sensor, LIS3DH accelerometer, infrared emitter, microphone, buzzer, 5-way switch ;
  • Expansion ports: 2x Grove ports, 1x Raspberry-Pi compatible 40-pin header.

Wireless connectivity, extensibility, processing power… on paper, the Wio Terminal must be the ideal platform for IoT development, right? Well, ironically, one thing it doesn’t do out-of-the-box is to actually connect to an IoT cloud platform!

You will have guessed it by now… In this blog post, you’ll learn how to connect your Wio Terminal to Azure IoT. More importantly, you will learn about the steps I followed, giving you all the information you need in order to port the Azure IoT Embedded C libraries to your own IoT device.

Connecting your Wio Terminal to Azure IoT

I have put together a sample application that should get you started in no time.

You will need a Wio Terminal, of course, an Azure IoT Hub instance, and a working Wi-Fi connection. The Wio Terminal will need to be connected to your computer over USB—kudos to Seeed Studio for providing a USB-C port, by the way!—so it can be programmed.

Here are the steps you should follow to get your Wio Terminal connected to Azure IoT Hub:

  1. If you don’t have an Azure subscriptioncreate one for free before you begin.
  2. Create an IoT Hub and register a new device (i.e. your Wio Terminal). Using the Azure portal is probably the most beginner-friendly method, but you can also use the Azure CLI or the VS Code extension. The sample uses symmetric keys for auhentication.
  3. Clone and open the sample repository in VS Code, making sure you have the PlatformIO extension installed.
  4. Update the application settings (include/config.h) file with your Wi-Fi, IoT Hub URL, and device credentials.
  5. Flash your Wio Terminal. Use the command palette (Windows/Linux: Ctrl+Shift+P / macOS: ⇧⌘P) to execute the PlatformIO: Upload command. The operation will probably take a while to complete as the Wio Terminal toolchain and the dependencies of the sample application are downloaded, and the code is compiled and uploaded to the device.
  6. Once the code has been uploaded successfully, your Wio Terminal LCD should turn on and start logging connection traces.
    You can also open the PlatformIO serial monitor to check the logs of the application (PlatformIO: Serial Monitor command).
> Executing task: C:\Users\kartben\.platformio\penv\Scripts\platformio.exe device monitor <
--- Available filters and text transformations: colorize, debug, default, direct, hexlify, log2file, nocontrol, printable, send_on_enter, time
--- More details at http://bit.ly/pio-monitor-filters
--- Miniterm on COM4  9600,8,N,1 ---
--- Quit: Ctrl+C | Menu: Ctrl+T | Help: Ctrl+T followed by Ctrl+H ---
Connecting to SSID: WiFi-Benjamin5G
......
> SUCCESS.
Connecting to Azure IoT Hub...
> SUCCESS.

Your device should now be sending its accelerometer sensor values to Azure IoT Hub every 2 seconds, and be ready to receive commands remotely sent to ring its buzzer.

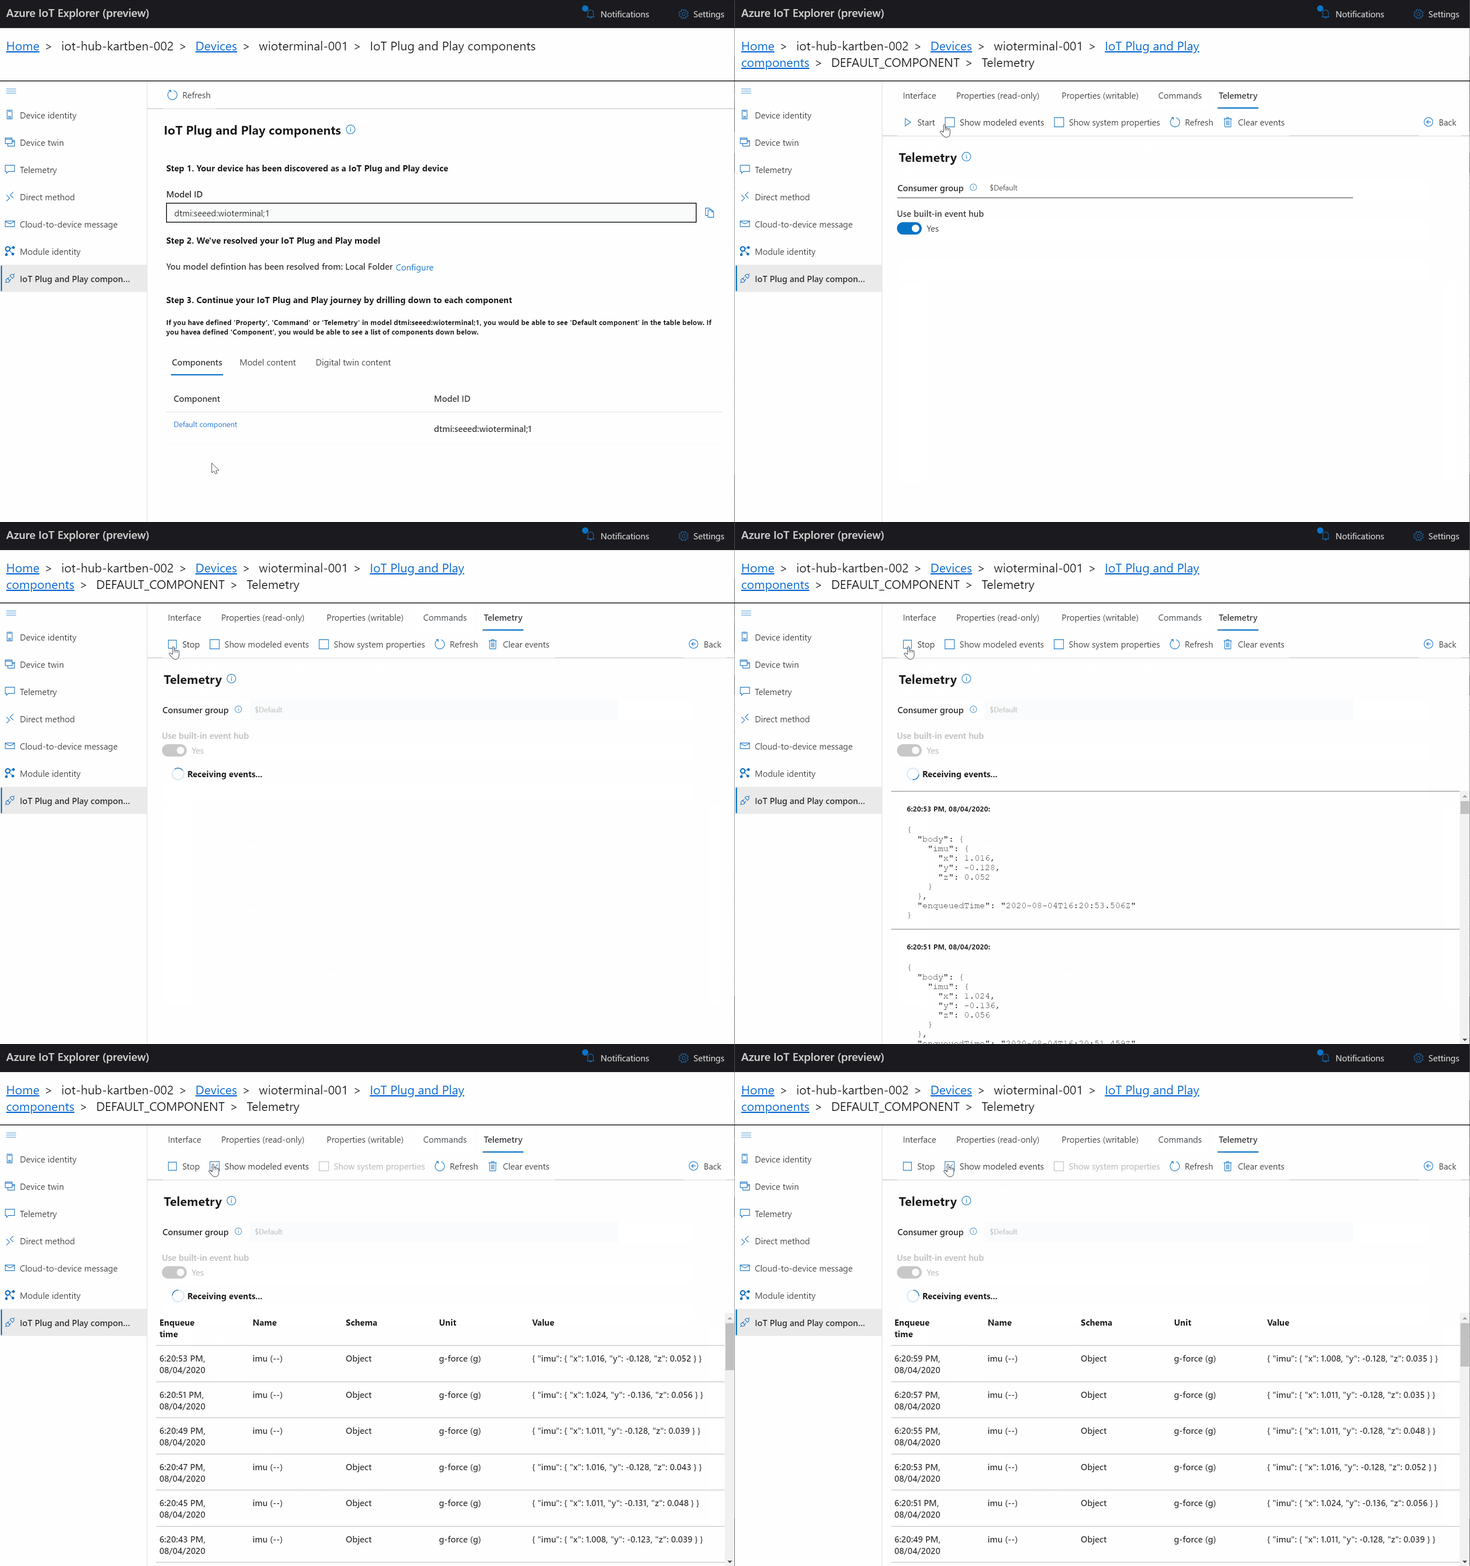
Please refer to the application’s README to learn how to test that the sample is working properly using Azure IoT Explorer.

It is important to mention that this sample application is compatible with IoT Plug and Play. It means that there is a clear and documented contract of the kind of messages the Wio Terminal may send (telemetry) or receive (commands).

You can see the model of this contract below—it is rather straightforward. It’s been authored using the dedicated VS Code extension for DTDL, the Digital Twin Description Language.

{
  "@context": "dtmi:dtdl:context;2",
  "@id": "dtmi:seeed:wioterminal;1",
  "@type": "Interface",
  "displayName": "Seeed Studio Wio Terminal",
  "contents": [
    {
      "@type": [
        "Telemetry",
        "Acceleration"
      ],
      "unit": "gForce",
      "name": "imu",
      "schema": {
        "@type": "Object",
        "fields": [
          {
            "name": "x",
            "displayName": "IMU X",
            "schema": "double"
          },
          {
            "name": "y",
            "displayName": "IMU Y",
            "schema": "double"
          },
          {
            "name": "z",
            "displayName": "IMU Z",
            "schema": "double"
          }
        ]
      }
    },
    {
      "@type": "Command",
      "name": "ringBuzzer",
      "displayName": "Ring buzzer",
      "description": "Rings the Wio Terminal's built-in buzzer",
      "request": {
        "name": "duration",
        "displayName": "Duration",
        "description": "Number of milliseconds to ring the buzzer for.",
        "schema": "integer"
      }
    }
  ]
}

When connecting to IoT Hub, the Wio Terminal sample application “introduces itself” as conforming to the dtmi:seeed:wioterminal;1 model.

This allows you (or anyone who will be creating IoT applications integrating with your device, really) to be sure there won’t be any impedence mismatch between the way your device talks and expects to be talked to, and what your IoT application does.

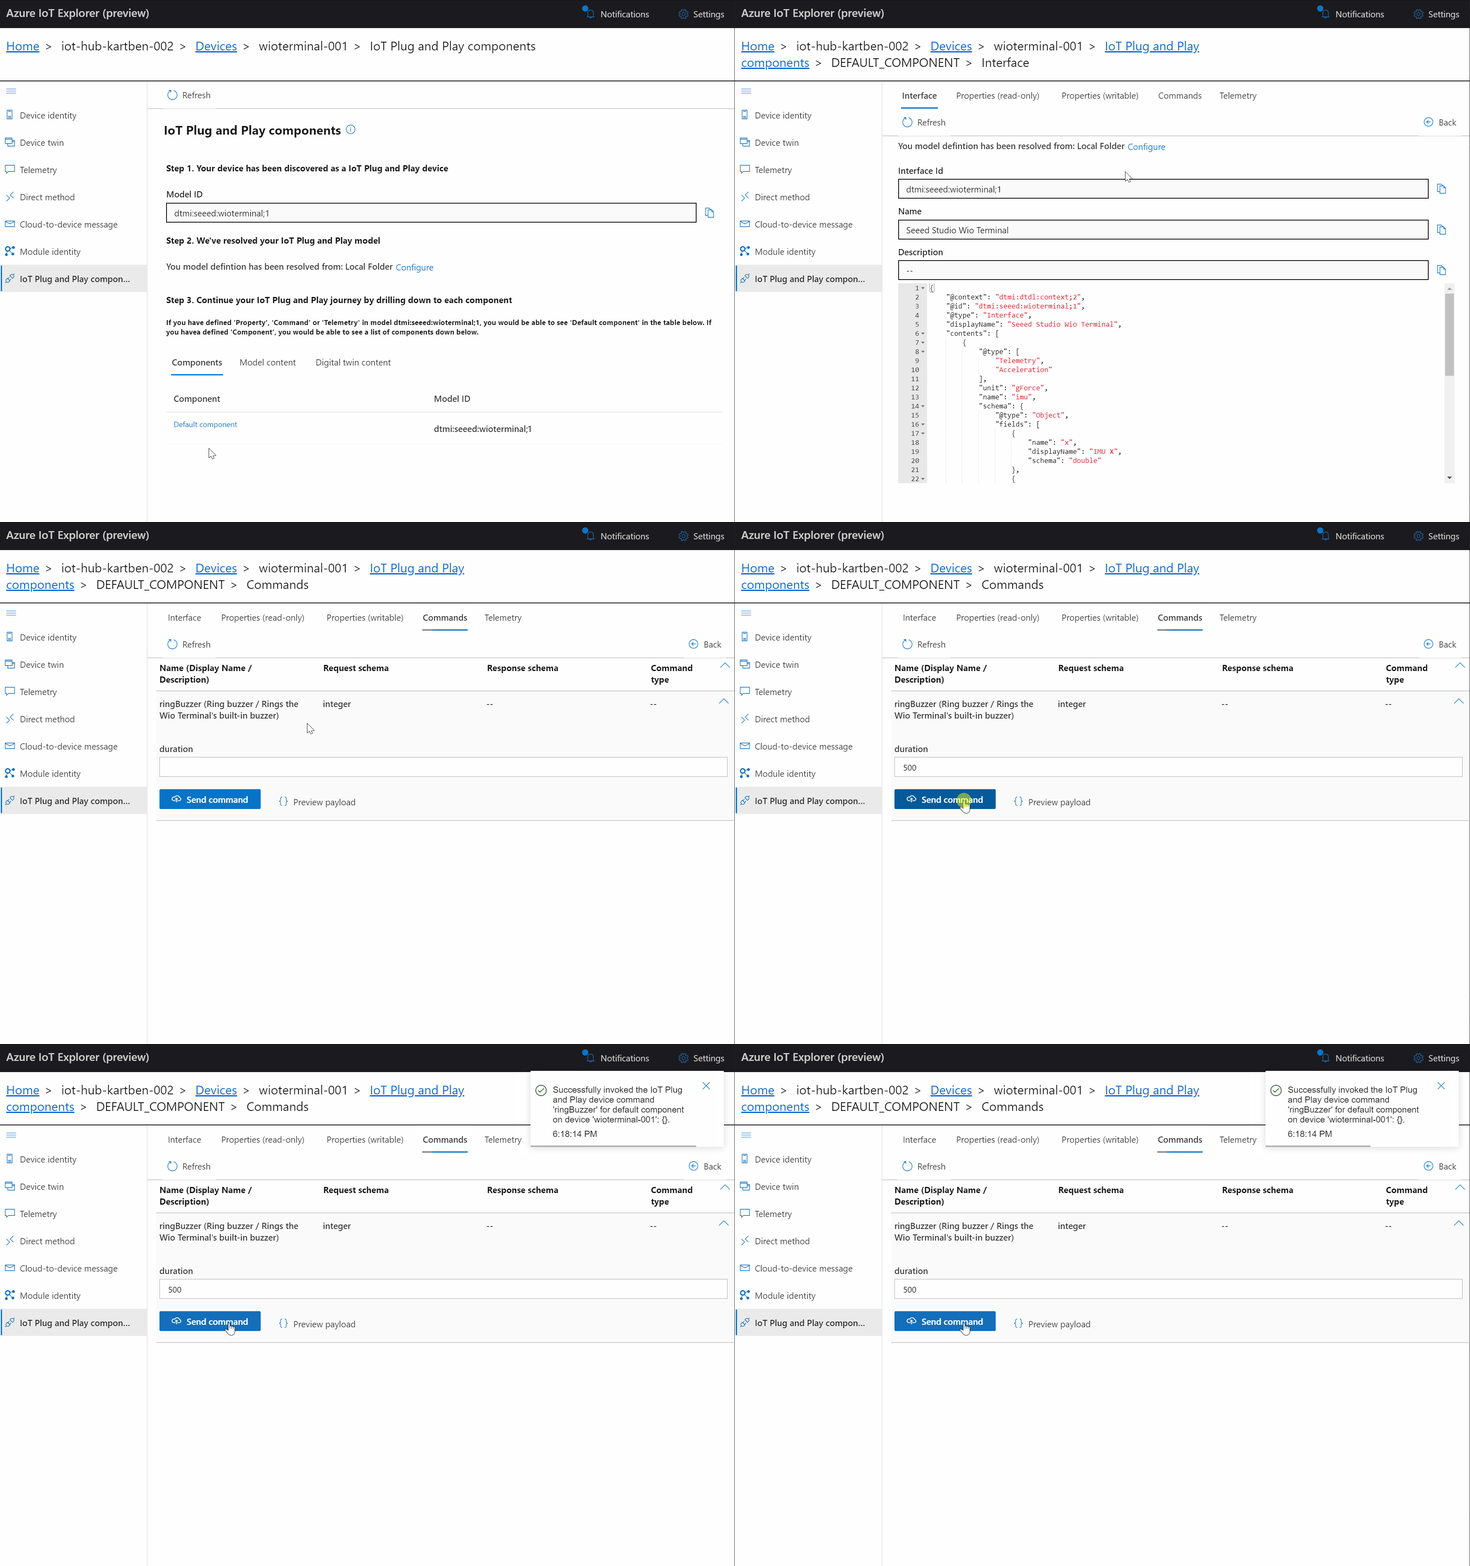
A great example of why being able to automagically match a device to a corresponding DTDL model is useful can be illustrated with the way we used the Azure IoT Explorer earlier. Since the device “introduced itself” when connecting to IoT Hub, and since Azure IoT Explorer has a local copy of the model, it automatically showed us a dedicated UI for sending the ringBuzzer command!
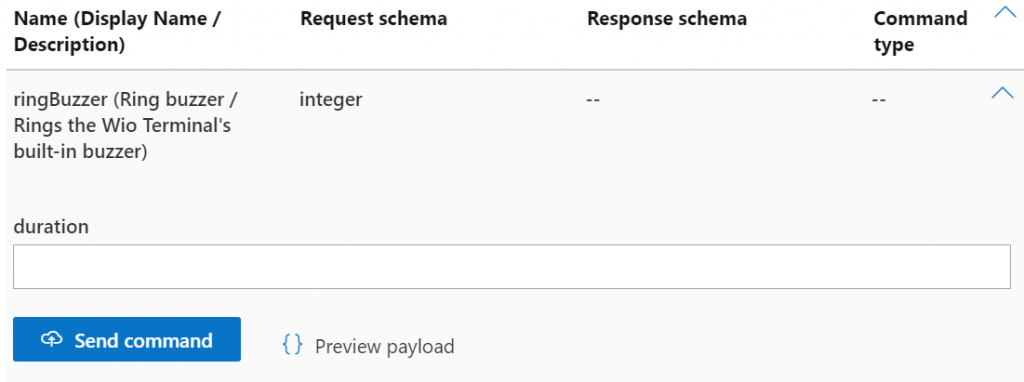
Thanks to IoT Plug and Play, any application or tool can easily leverage the model that describes a device’s capabilities to.
Here, Azure IoT Explorer uses the model to help the user send commands that the device can actually understand.

Azure SDK for Embedded C

In the past, adding support for Azure IoT to an IoT device using the C programming language required to either use the rather monolithic (ex. it is not trivial to bring your own TCP/IP or TLS stack) Azure IoT C SDK, or to implement everything from scratch using the public documentation of Azure IoT’s MQTT front-end for devices.

Enter the Azure SDK for Embedded C!

The Azure SDK for Embedded C is designed to allow small embedded (IoT) devices to communicate with Azure services.

The Azure SDK team has recently started to put together a C SDK that specifically targets embedded and constrained devices. It provides a generic, platform-independent, infrastructure for manipulating buffers, logging, JSON serialization/deserialization, and more. On top of this lightweight infrastructure, client libraries for e.g Azure Storage or Azure IoT have been developed.

You can read more on the Azure IoT client library here, but in a nutshell, here’s what I had to implement in order to use it on the Wio Terminal connected:

  • As the sample uses symmetric keys to authenticate, we need to be able to generate a security token.
    • The token needs to have an expiration date (typically set to a few hours in the future), so we need to know the current date and time. We use an NTP library to get the current time from a time server.
    • The token includes an HMAC-SHA256 signature string that needs to be base64-encoded. Luckily, the recommended WiFi+TLS stack for the Wio Terminal already includes Mbed TLS, making it relatively simple to compute HMAC signatures (ex. mbedtls_md_hmac_starts) and perform base64 encoding (ex. mbedtls_base64_encode).
  • The Azure IoT client library helps with crafting MQTT topics that follow the Azure IoT conventions. However, you still need to provide your own MQTT implementation. In fact, this is a major difference with the historical Azure IoT C SDK, for which the MQTT implementation was baked into it. Since it is widely supported and just worked out-of-the-box, the sample application uses the PubSubClient MQTT library from Nick O’Leary.
  • And of course, one must implement their own application logic. In the context of the sample application, this meant using the Wio Terminal’s IMU driver to get acceleration data every 2 seconds, and hooking up the ringBuzzer command to actual embedded code that… rings the buzzer.

Conclusion

I hope you found this post useful! I will soon publish additional articles that go beyond the simple “Hey, my Wio Terminal can send accelerometer data to the cloud!” to more advanced use cases such as remote firmware upgrade. Stay tuned! 🙂

Let me know in the comments what you’ve done (or will be doing!) with your Wio Terminal, and also don’t hesitate to ask any burning question you may have.

If you liked this article, don’t forget to subscribe to be notified of upcoming publications. And of course, you can also always find me on Twitter.
Categories
IoT

Top 5 VS Code Extensions for IoT Developers

In just a few years, Visual Studio Code has conquered the hearts of a wide variety of developers. It took off very quickly in the web development communities, but it has now also become the IDE of choice for Java, Python, or C/C++ developers as well, whether they run Linux, MacOS, or Windows. In fact, in Stack Overflow’s most recent developer survey, VS Code is ranked at over 50% market share among the 90,000+ developers who responded.

Whether you’re just getting into IoT or whether you’ve been working on IoT solutions for some time already, you’ve probably realized that “full-stack developer” is a term that also often applies to IoT. You may very well be spending most of your days working on developing and testing the firmware of your connected embedded device in C. Still, once in a while, you may want to tune some Python scripts used for you build system, or use a command-line tool to check that your IoT backend services are up and running.

Rather than having to switch from one development environment or command line terminal to the other, I wouldn’t be surprised if, just like me, you’d be interested in doing most of your work without ever leaving your IDE.

In this article, we look at some essential VS Code extensions that will help you become a more productive IoT developer.

VS Code extension for Arduino

It’s been a very long time since I last opened the Arduino IDE on my computer. It is a great tool, especially for helping newcomers get started with the Arduino ecosystem, but it is lacking some key features for anyone interested in doing more than just blinking an LED or running basic programs. And now that more and more platforms are compatible with Arduino, from RISC-V developer kits such as HiFive1, to ESP32 or STM32 Nucleo family, there are even more reasons for looking for a better IDE for Arduino development.

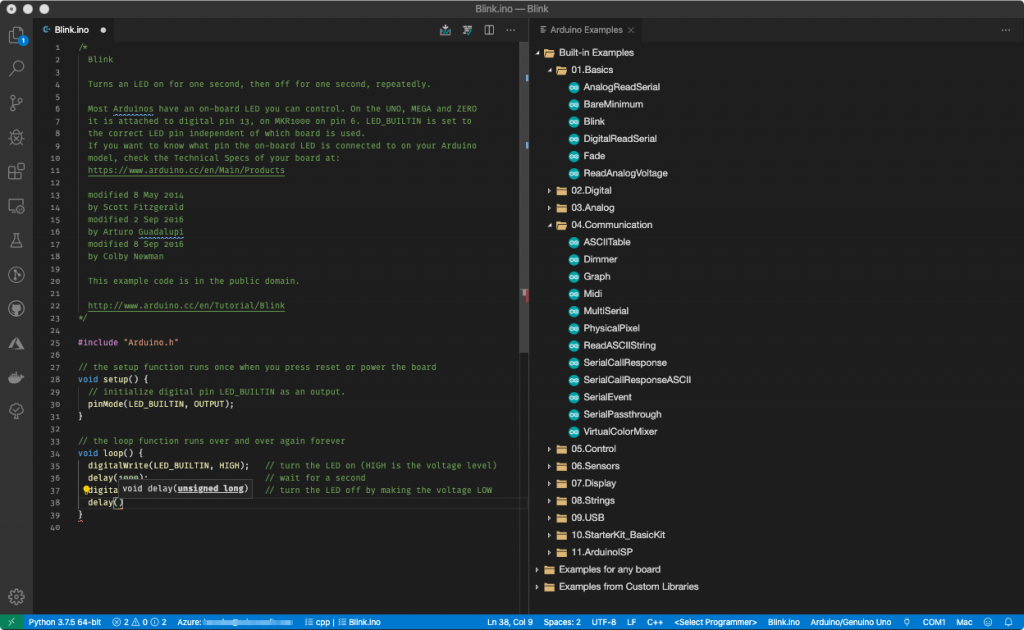
The VS Code extension for Arduino is built on top of the official Arduino IDE—which you need to install once but will probably never open ever again—and provides you with all the features you’d expect to find in the classic IDE (e.g. browsing code samples or monitor your serial port).

The VS Code extension for Arduino in action.

What makes the extension particularly powerful in my opinion, is the fact it builds on top of the VS Code C/C++ tools to provide you with full-blown Intellisense and code navigation for your code, which proves to be very useful

I vividly remember the first time I put my hands on and soldered an Arduino-compatible board, circa 2010, at the TechShop Menlo Park. It’s been incredible to see the Arduino ecosystem grow over the years. Equally incredible is to think that until very recently, debugging a so-called sketch was reserved for the most adventurous programmers. If there was only one reason for you to try out the VS Code extension for Arduino, it has to be the fact it makes debugging Arduino programs so much easier (no more ‘Serial.println’ traces, yay!).

Behind the scenes, the extension leverages common debug interfaces such as CMSIS-DAP, JLink, and ST-Link. If your device already has an onboard debugging chip implementing one of these interfaces, you’re all set! If not, you will simply need to look at using an external connector that’s compatible with your chip.


PlatformIO IDE

Like I mentioned in the previous section, there are more and more platforms that tap into the Arduino paradigm, but there is, of course, more to embedded development than the Arduino ecosystem.

PlatformIO.org logo

PlatformIO originated as an open-source command-line tool to support IoT and embedded developers by providing a uniform mechanism for toolchain provisioning, library management, debugging, etc. It quickly evolved to integrate tightly with VS Code, and the PlatformIO IDE extension for VS Code is now one of the most popular ones on the Visual Studio Marketplace.

PlatformIO supports 30+ platforms (ex. Atmel AVR, Atmel SAM, ESP-32 and 8266, Kendryte K210, Freescale Kinetis, etc. ), 20+ frameworks (Arduino, ESP-IDF, Arm Mbed, Zephyr, …) and over 750 different boards! For each of these platforms, the extension will help you write your code (code completion, code navigation), manage your dependencies, build and debug, and interact with your device using the serial port monitor.

Another interesting feature is the ability to convert an existing Arduino project to the PlatformIO format, essentially making it much easier to share with your coworkers (and the world!), since it can then leverage PlatformIO’s advanced library management features. For example, it can automatically pull your 3rd party libraries solely based on the header files you’re including in your code.  


Azure IoT Tools

The Azure IoT Tools extension for VS Code is essentially an extension bundle that installs in one single click the Azure IoT Hub Toolkit, the IoT Edge extension, and the Device Workbench.

Azure IoT

As you look at connecting your devices to the cloud, Azure IoT Hub provides you with all you need to manage your devices, collect their telemetry and route it to consuming services, and more. Using the Azure IoT Hub extension, you can easily provision an IoT Hub instance in your Azure subscription, provision your devices, monitor the data they are sending, etc. all without having to leave your IDE!

If you are interested in using a container-based architecture for making your IoT gateways smart, chances are IoT Edge can help you! Thanks to the dedicated extension, you can easily build your custom IoT Edge modules, and deploy them to your edge devices connected to IoT Hub, either real ones or simulated ones running on your development machine.

Finally, the Device Workbench can help you get started very quickly with actual devices. It provides a set of tools to help with building your own IoT plug-and-play device, or simply to try out Azure IoT with an actual device, using one of the many examples bundled with the workbench.

What do I like the most with the Azure IoT Tools extension? Every few weeks, you get tons of awesome updates and new features, as the extension is actively developed.

By the way, if you don’t have an Azure subscription and want to get started with IoT on Azure, you can create a free trial account here!


Remote Development extension pack

IoT Development is much more than writing code for embedded devices. Frequently, you will find yourself in a situation where you want to interact with a folder that lives in a container on a remote edge gateway, or on a cloud server. You sure can use SSH and/or SCP to sync your local and remote development environments, but this can be pretty painful and error-prone.

The Remote Development extension pack allows you to open any folder in a container or on a remote machine and to then just use VS Code’s as if you were manipulating local resources.


REST Client

If you are like me, your go-to tool for testing REST APIs is probably Postman. It is indeed a great tool for creating and testing REST, SOAP, or GraphQL requests and it even allows you to save queries in the cloud and to share them with your colleagues. However, I recently found myself in a situation where I wanted to share some sample queries with people during a training session, and I didn’t want them to have to copy-paste unnecessarily from the training instructions to Postman; instead, I wanted the queries to be part of the actual training material!

The REST Client extension turns any file with an .http or .rest extension into an executable notebook, where you can very easily execute all the queries contained in it.

As you build an end-to-end IoT solution, it is more than likely that you will rely on 3rd party services along the way, and that you will interact with them using some form of REST API. For example, you may rely on a weather service as part of your predictive maintenance computations. Below is an example of how I shared with my students a few queries showing how to use the Azure Maps API to compute routes or render map tiles.

https://gist.github.com/kartben/deba6c69f6e506e94bc2a527badf1269

And now for the same queries (except for the subscription key which has been replaced by a real one 🙂) executed in real-time thanks to the REST Client extension:

How about you? Are there other VS Code extensions that you’ve found useful for your IoT projects? If so, I would love to hear about them in the comments.

You can also always find me on Twitter to continue the conversation.