With Kubecon happening this week in Austin, it is probably a good time to write an article on the role of containers and having a cloud native strategy for IoT, don’t you think?
Over the past years, Docker and its ecosystem have been instrumental in modernizing our approach to writing and shipping software. Today, more and more applications are becoming cloud native, meaning that not only core functionalities are being isolated as (micro)services, but also that applications are evolving to be first-class citizens in cloud environments (e.g exposing health metrics, acting as stateless processes, etc.).
In this blog post, we will be looking at how to approach cloud native IoT development. We will be deploying an end-to-end IoT solution for power consumption monitoring on OpenShift. The deployed services include:
- IoT connectivity layer – getting telemetry data into a backend system is a challenge in itself, and we’ll see how Eclipse Hono can help with IoT connectivity ;
- Device data simulator – as a way to illustrate how thinking cloud native for IoT can help make your application scale, we will actually have device simulators running on our cluster ;
- Monitoring dashboards – we’ll see how we can leverage Grafana to visualize the data coming into our cluster, and its overall health ;
- End-user application – getting IoT data into our backend is one thing, but we’ll also see how to develop a simple web application to visualize our instant power consumption ;
- Cloud IDE – we will be using Eclipse Che to develop the web application mentioned just before.
So, let’s break this down!
Firing up a single-node OpenShift cluster with Minishift
The best way to get an OpenShift cluster setup is to use Minishift, which helps you deploy a single-node cluster on your local machine.
You can download the latest Minishift releases, and find install instructions on the project’s Github repository.
Once you have the Minishift command installed, firing up the cluster is actually pretty easy. Here’s the command I use on my quad-core Intel i7 MacBook Pro:
minishift start --cpus 4 --memory 12GB --metrics --disk-size 40GB
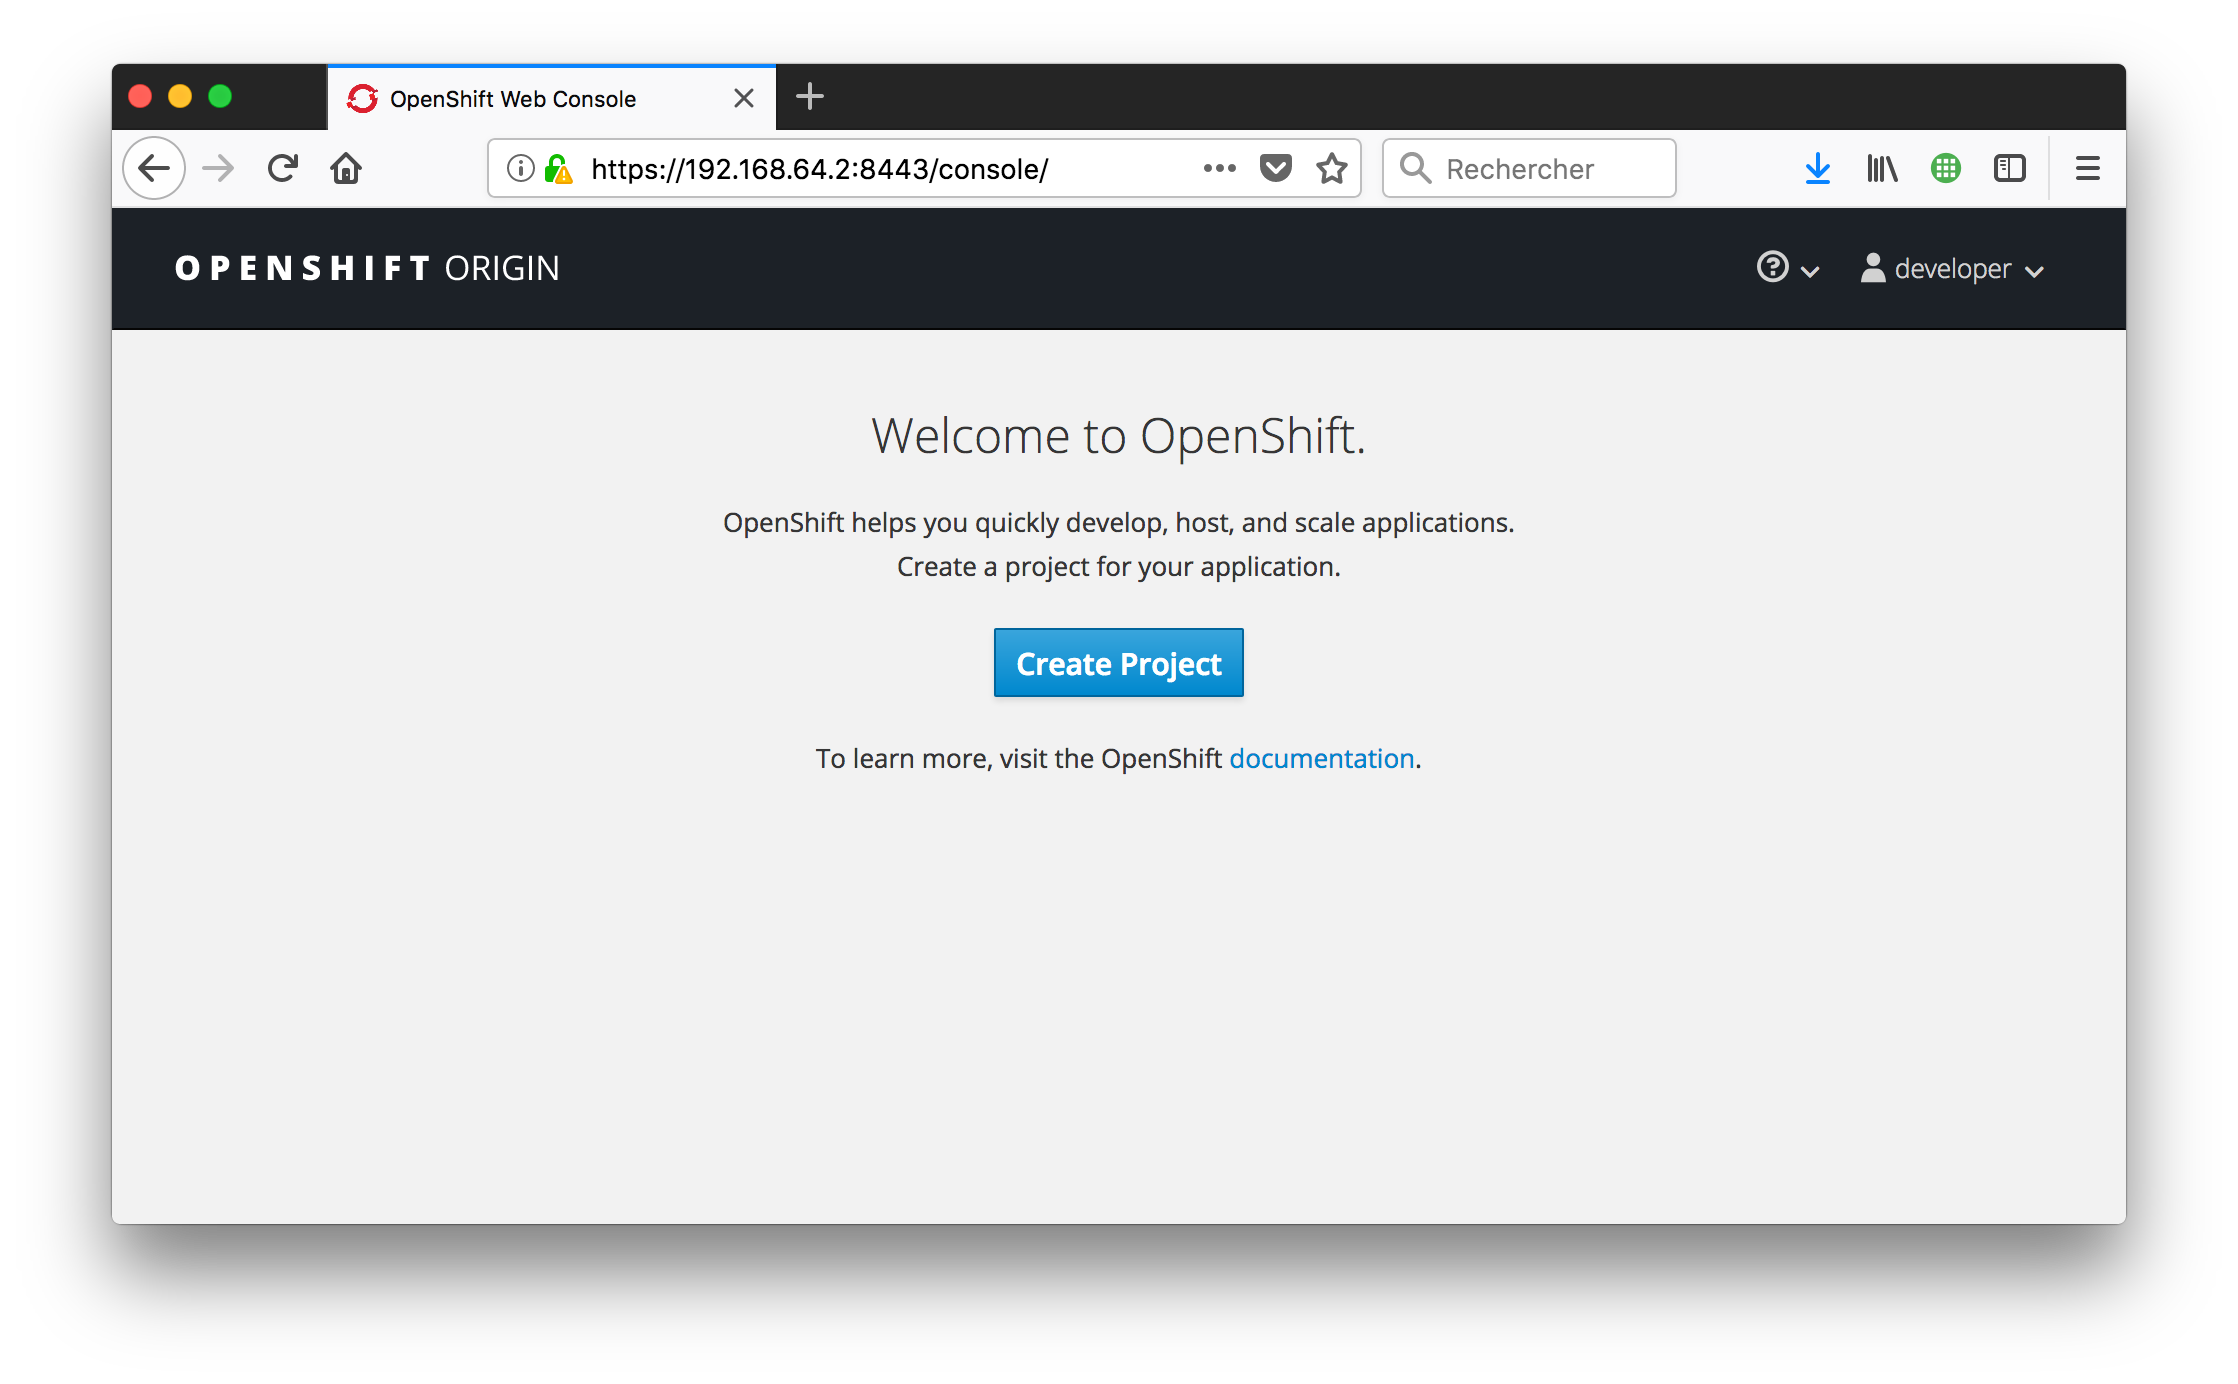 Obviously, your mileage will vary depending on the number of CPUs, memory, or disk space you want to allocate to your cluster, but no matter what your operating system is, soon enough you should be able to log into the OpenShift web console.
Scalable IoT Messaging with Eclipse Hono
Eclipse Hono enables scalable and secure ingestion of large volumes of sensor data into backend systems.
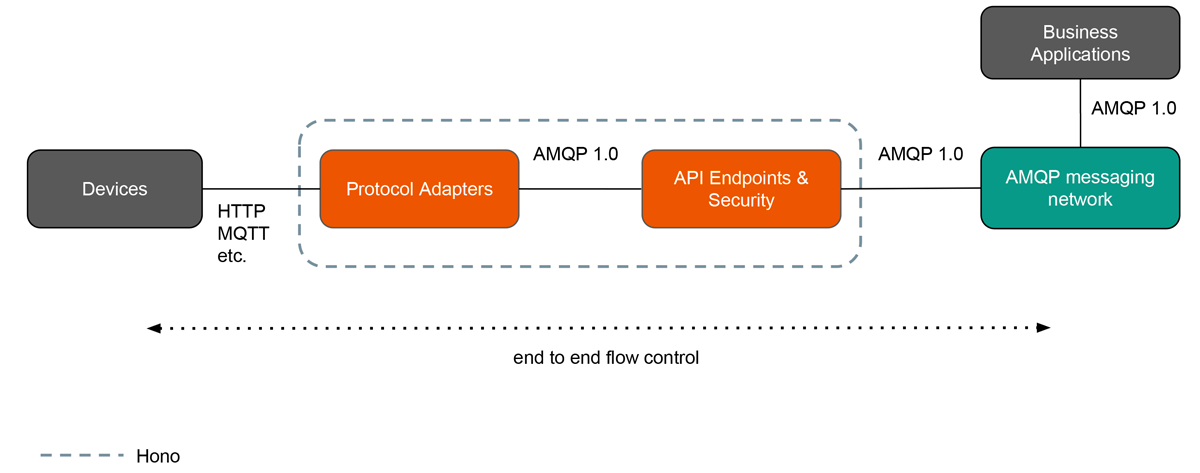
The different building blocks of Hono (protocol adapters, device registry, …) can be deployed as microservices.
Deploying Hono on OpenShift is really easy: just follow the instructions available in the documentation! In my setup I’ve deployed a Hono environment where the core messaging functionality is taken care of by EnMasse, but you should also be fine with the regular, Qpid Dispatch-based, distro.
Feeding data into our system
Now that our IoT connectivity layer is deployed, with Hono running within our cluster, we want to ingest data into our system, and consume this data to e.g store it in a database.
Jens Reimann put together a nice setup that uses a public dataset of the energy consumption of a residential house to simulate “real” IoT devices. The application essentially deploys two services on our cluster:
- A data simulator that sends energy consumption information to Hono using MQTT. The producer can be configured to simulate 1, 10… 10,000 of devices. And of course, you can also scale up the number of pods for the simulator to simulate even more devices.
- A data consumer that taps into Hono’s telemetry API to retrieve data coming from all our virtual houses, and dump it into an InfluxDB time-series database.
If you follow the install instructions provided in Jens’ repo, you should have your simulator and consumer running in your OpenShift cluster, and data will start showing up in your InfluxDB database.
Here’s an example of how my Grafana dashboard looks like:

Running Eclipse Che on OpenShift
So we now have an IoT messaging infrastructure deployed in our OpenShift cluster, as well as an IoT app effectively pumping business data into our backend. Wouldn’t it be cool if we could also have the developer tools needed to write our user-facing application running in the same cluster?
Eclipse Che is a developer workspace server and cloud IDE that we will be deploying in our cluster, and using to write some Javascript code right from our browser. Deploying Eclipse Che on OpenShift is pretty straightforward and you can refer to the instructions on the Eclipse Che website to deploy it into your OpenShift project.
In my case, here’s how I would get the nightly build of Che 5.x deployed into my OpenShift project:
export CHE_IMAGE_TAG="nightly-centos"
export CHE_MULTIUSER="false"
export CHE_OPENSHIFT_PROJECT="hono"

DEPLOY_SCRIPT_URL=https://raw.githubusercontent.com/eclipse/che/master/dockerfiles/init/modules/openshift/files/scripts/deploy_che.sh
WAIT_SCRIPT_URL=https://raw.githubusercontent.com/eclipse/che/master/dockerfiles/init/modules/openshift/files/scripts/wait_until_che_is_available.sh
STACKS_SCRIPT_URL=https://raw.githubusercontent.com/eclipse/che/master/dockerfiles/init/modules/openshift/files/scripts/replace_stacks.sh

curl -fsSL ${DEPLOY_SCRIPT_URL} -o ./get-che.sh
curl -fsSL ${WAIT_SCRIPT_URL} -o ./wait-che.sh
curl -fsSL ${STACKS_SCRIPT_URL} -o ./stacks-che.sh

bash ./get-che.sh ; bash ./wait-che.sh ; bash ./stacks-che.sh
And that’s it! Depending on your Internet speed it may take a few minutes for everything to get deployed, but Eclipse Che now just is a click away, accessible through a URL such as http://che-hono.192.168.64.2.nip.io/.

Writing our user-facing ExpressJS app from Eclipse Che
However quick this all was to set up, we’ve essentially worked on the infrastructure of IoT application: messaging, development environment, …
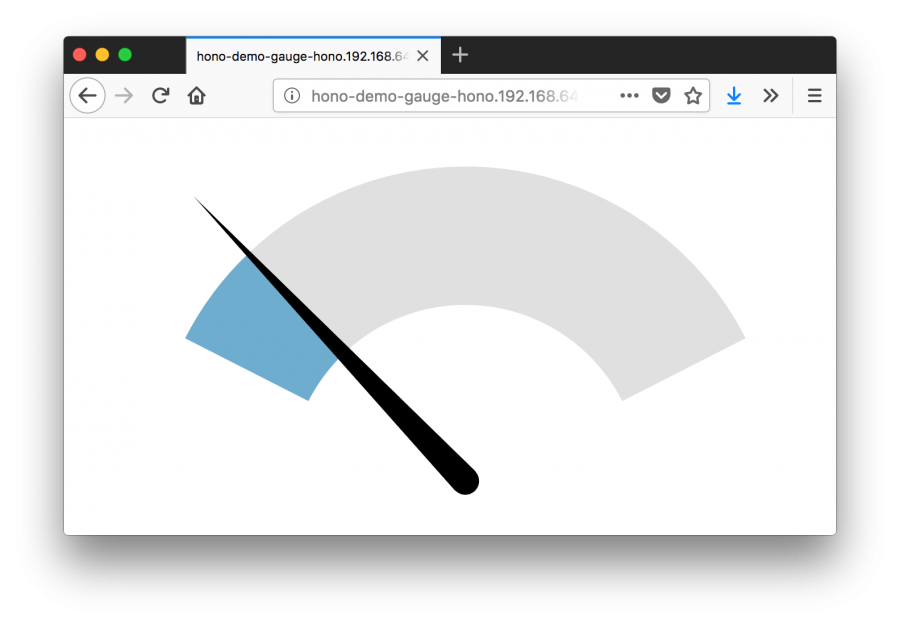 Arguably, the most interesting part is to actually make use of the data we’ve been collecting! For this, we will be developing a Node.js application that will be getting the overall electricity consumption metrics from InfluxDB and displaying them on a fancy gauge.
The final version of the app is available here on my Github account. It uses Express, the InfluxDB client for Node.js, as well as gaugeJS for the gauge widget.
There are at least two interesting things to note here:
- Thanks to Eclipse Che, we can not only easily set up a stack for Node.js development in no time, but we really have a full-blown IDE that includes advanced content assist features – not something you get that often when developing Javascript code. I can tell you that not being an expert in using the InfluxDB Javascript API, having code completion available in the IDE has been a pretty useful thing 🙂

- Since Eclipse Che runs on the very same OpenShift cluster that holds our IoT backend, we can easily test our code against it. From within our Che workspace, all our environment variables are set up, and we can e.g access Hono, InfluxDB, etc.
Closing the loop
One last thing… We now have a Node.js application built from Che, that lives in its own Github repo. Wouldn’t it be great to have it run in our cluster, alongside the rest of our microservices?
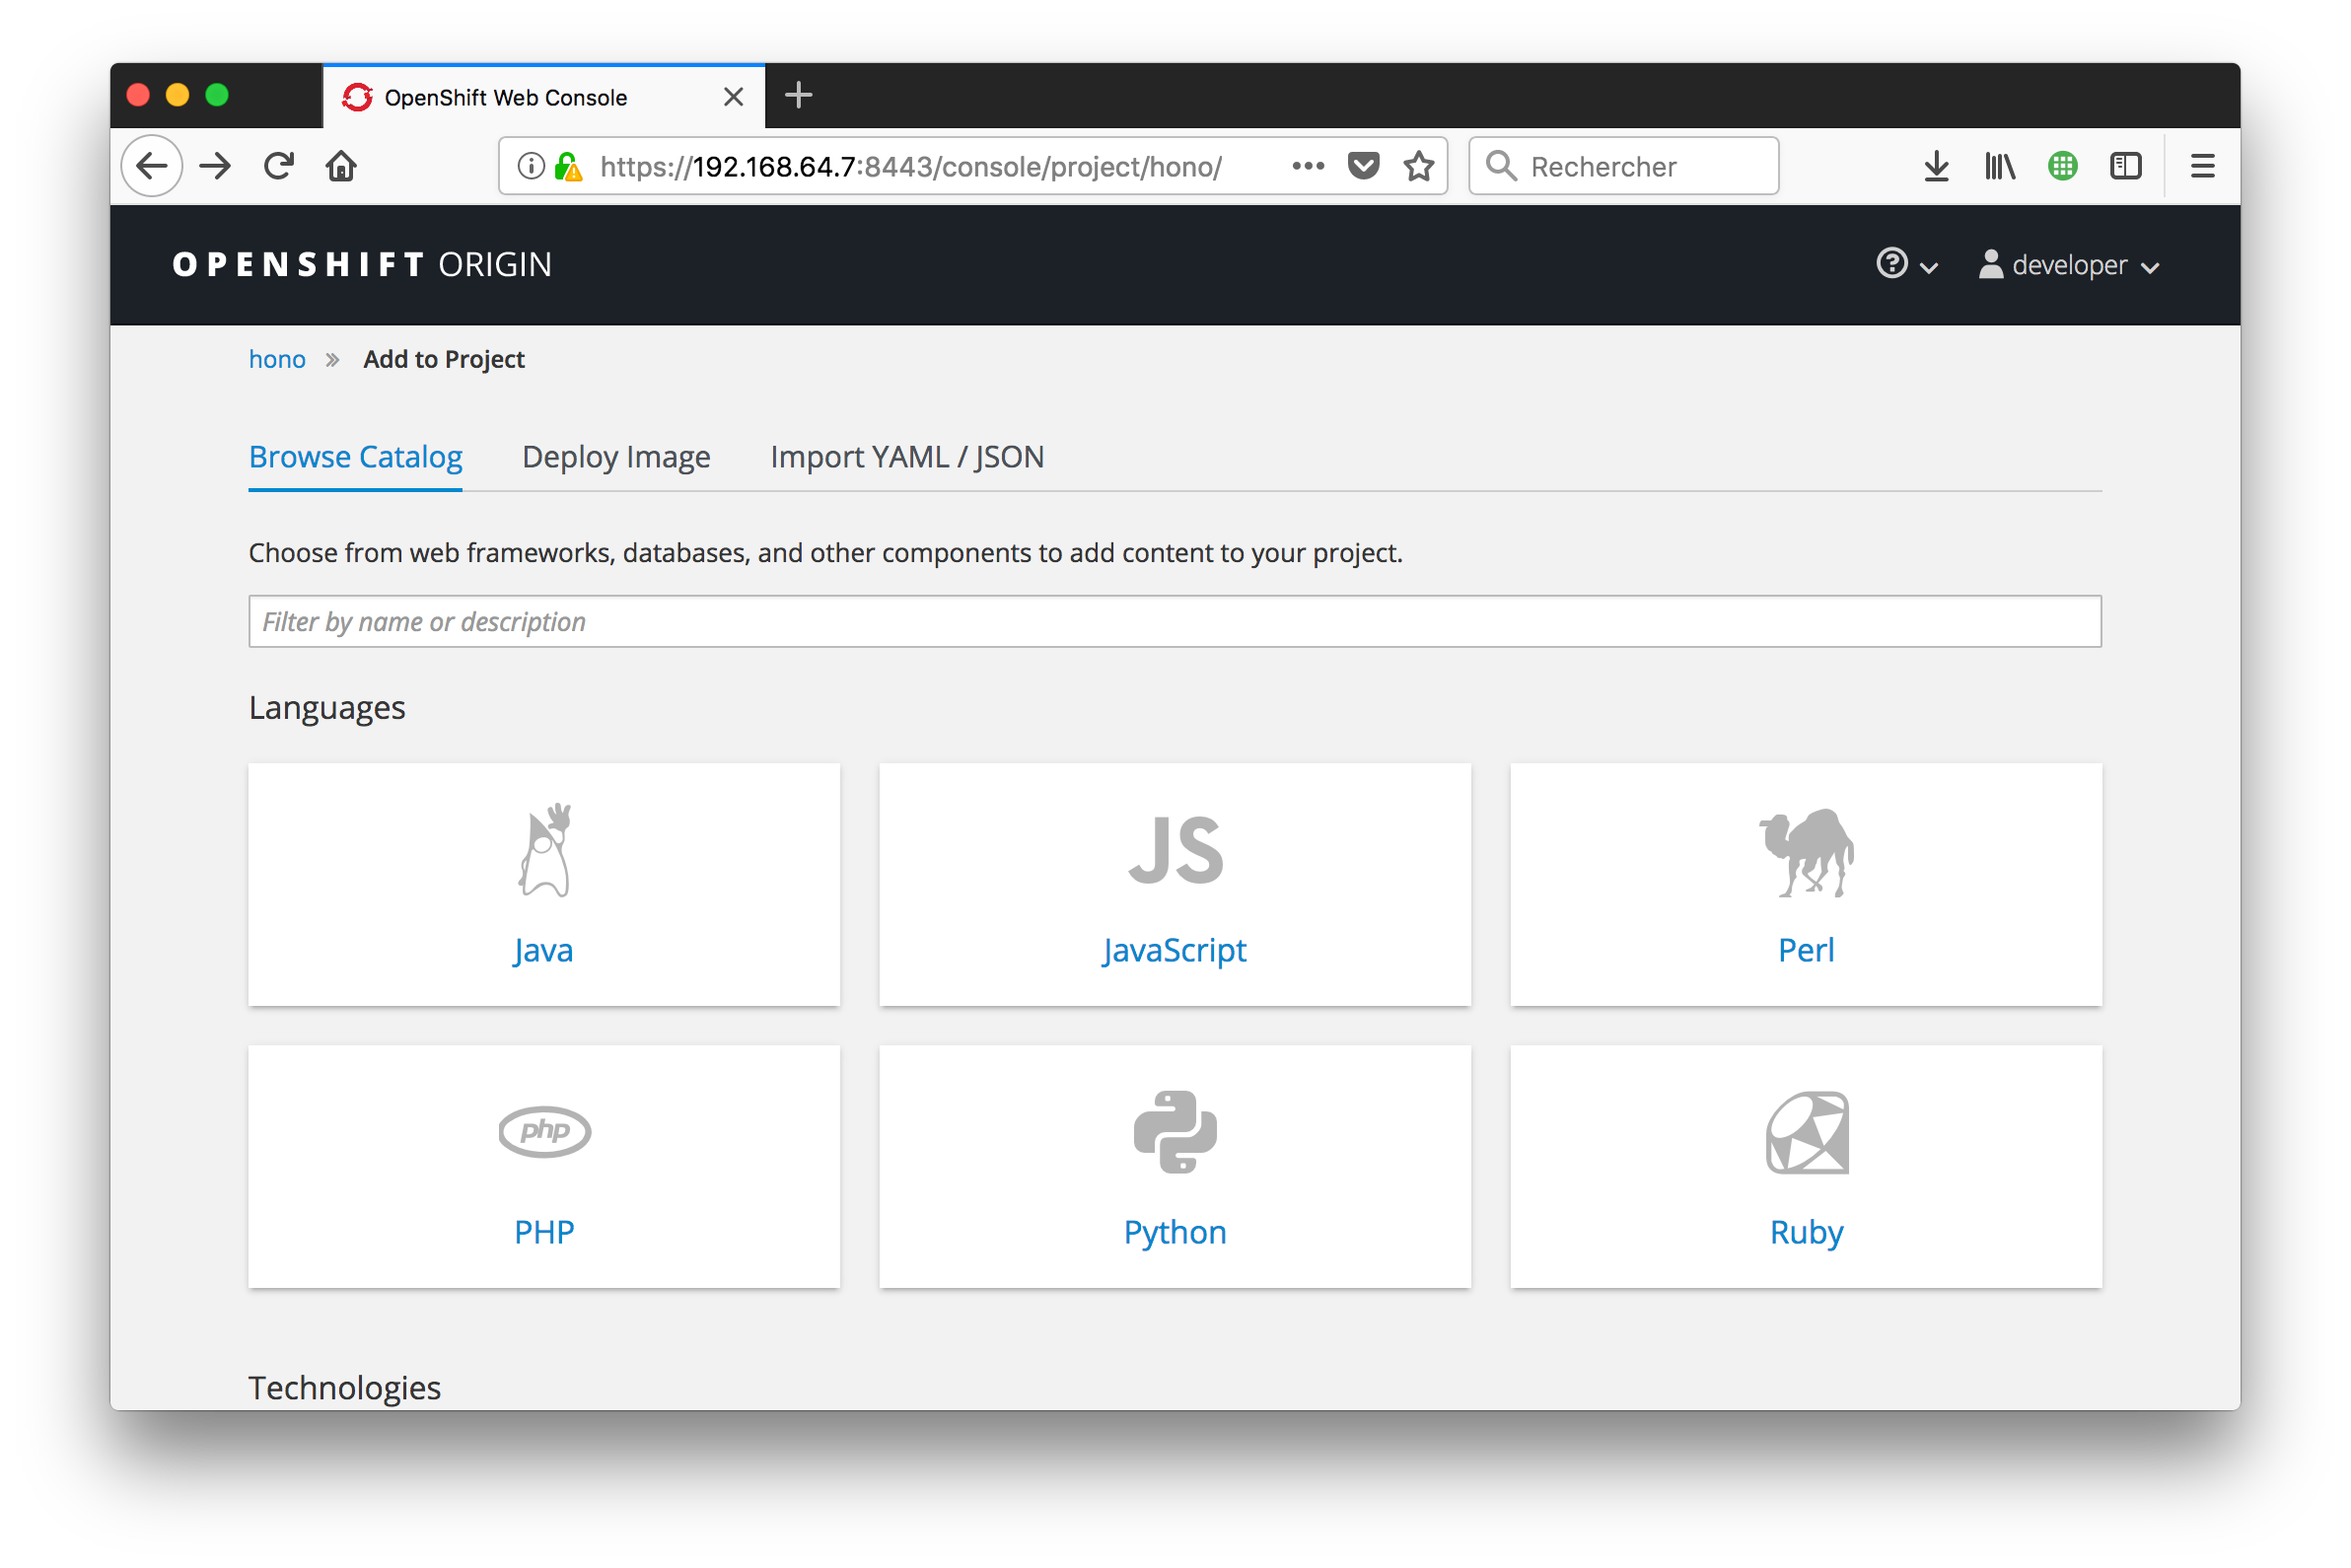
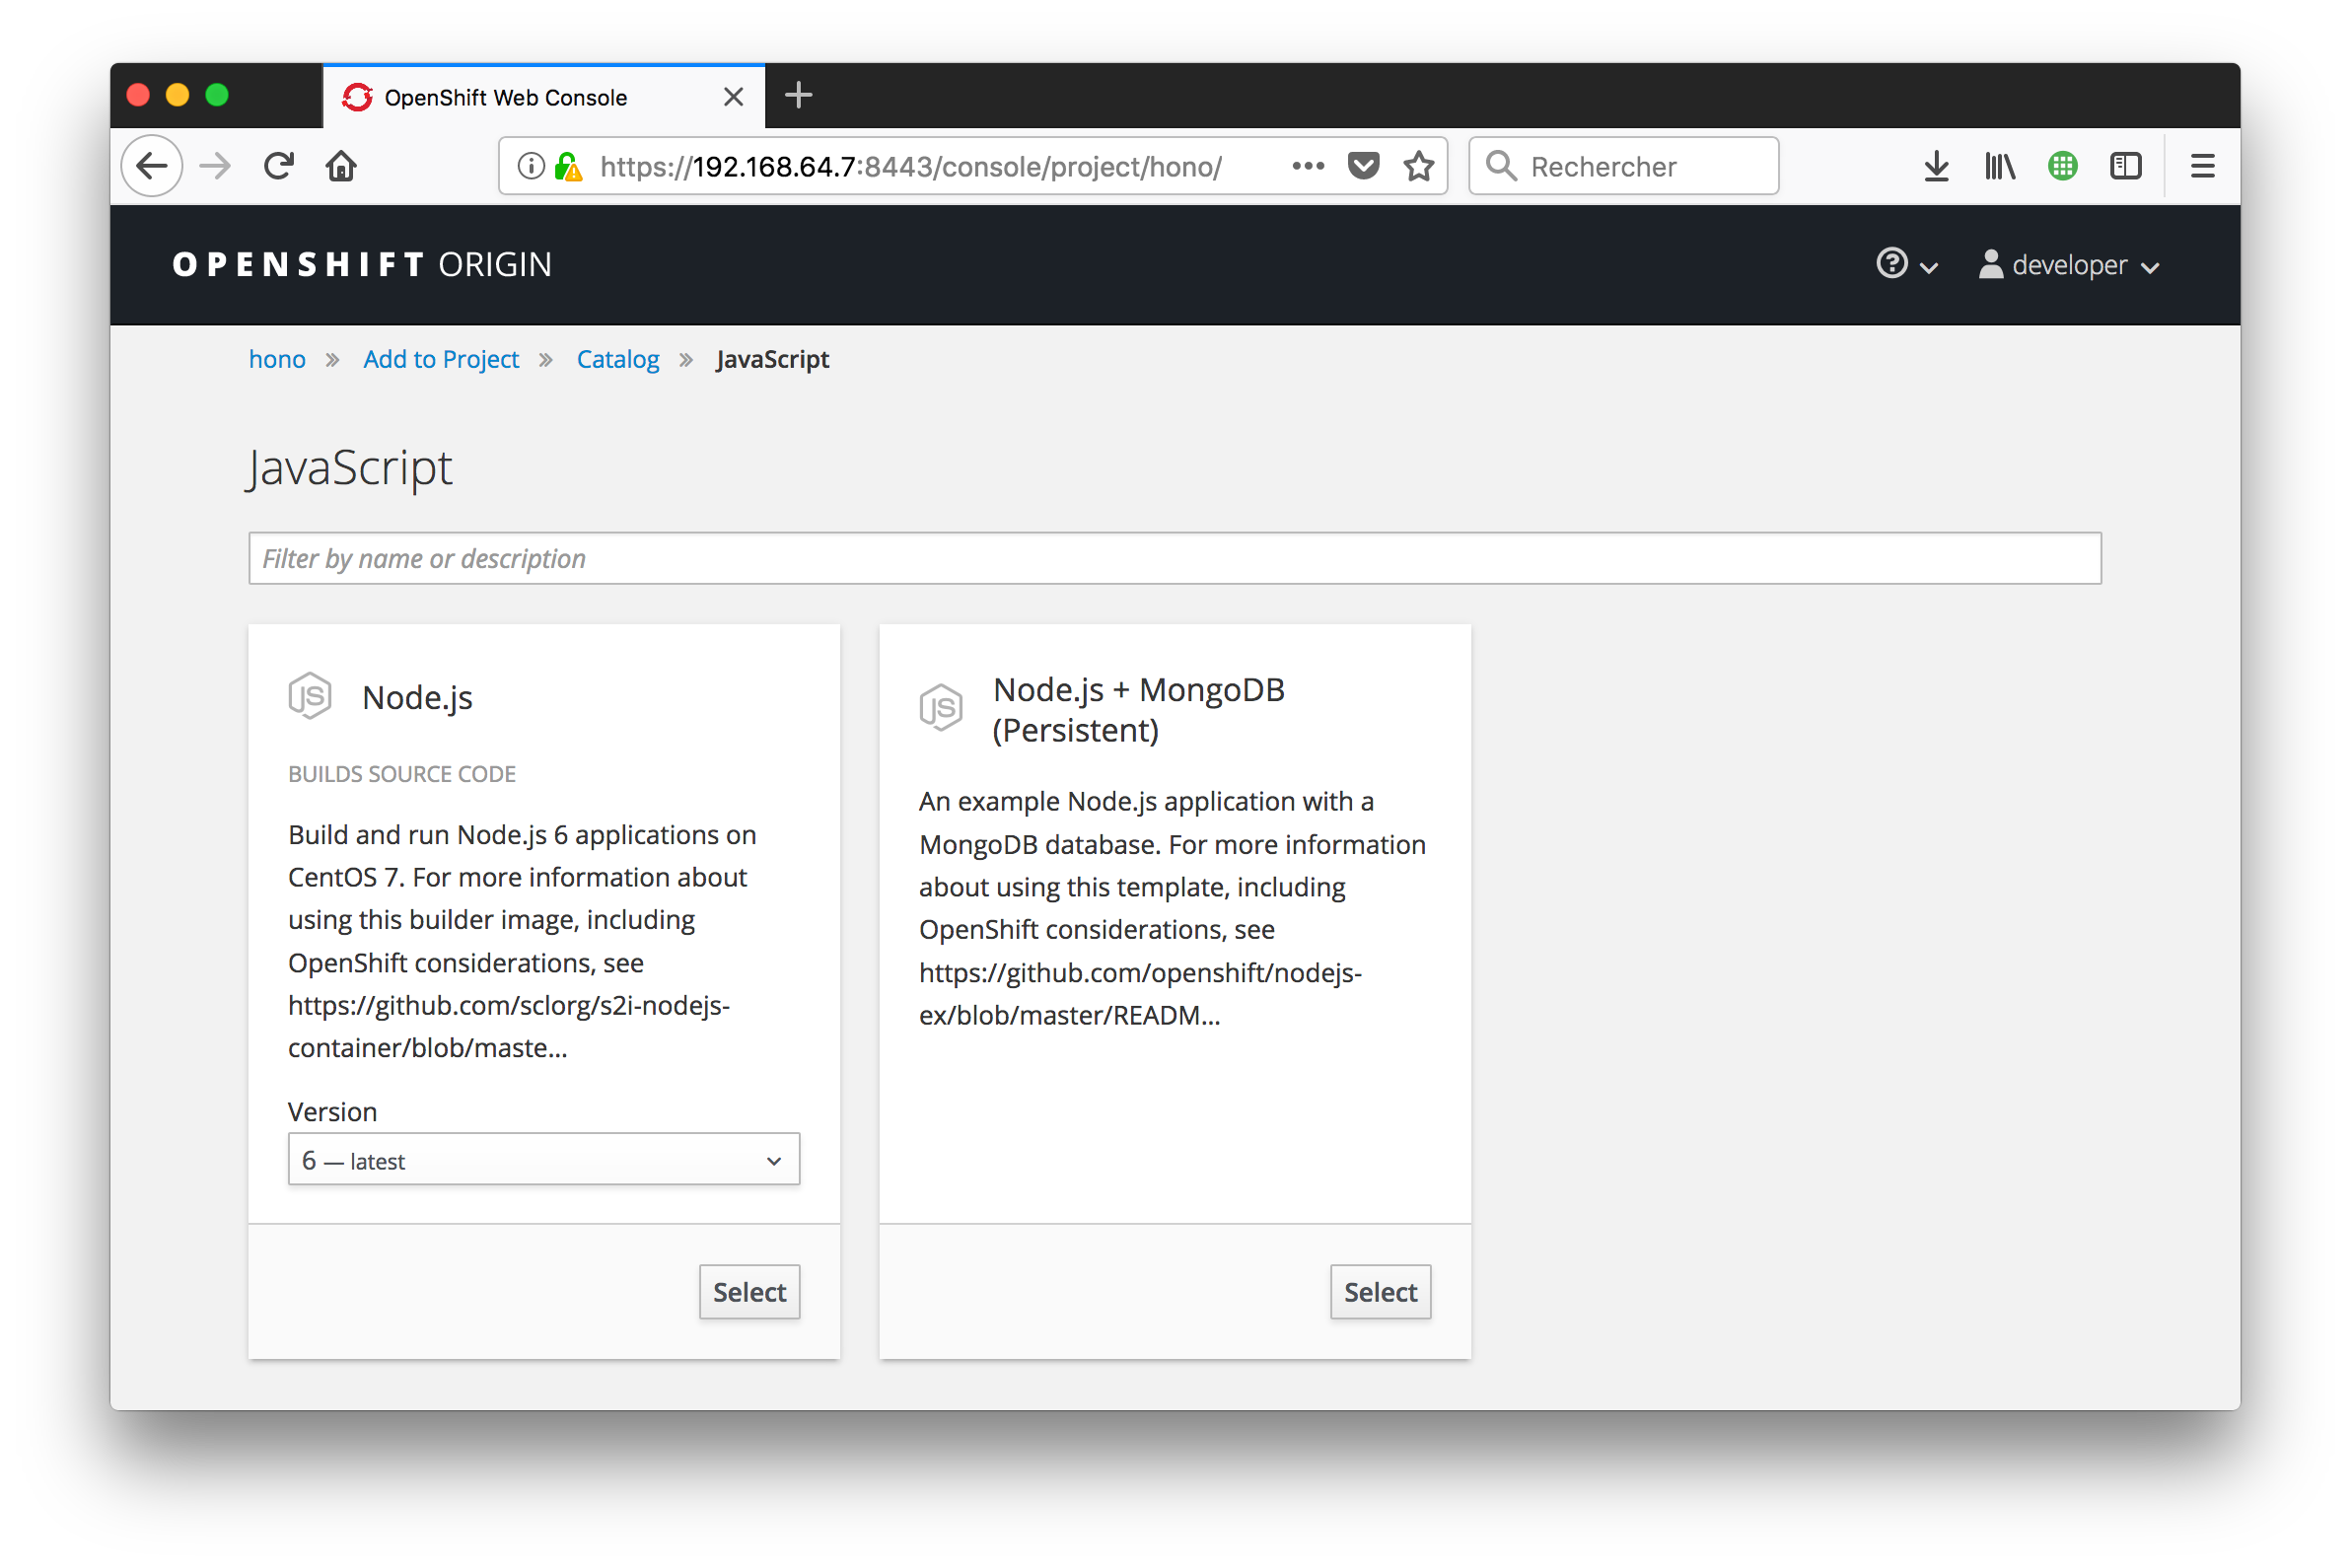
From the OpenShift console, you are just a couple clicks away from deploying the Node.js app into the cluster. You can use the template for Node.JS applications to automatically build a Docker image from the Github repository that contains our app. It will automatically detect that the repository contains a Node application, install all its dependencies, build an image, and then deploy it to a pod with a route properly configured to expose our app outside of the cluster.
You could also set up a hook so that whenever there is a new commit in the upstream repository, the image gets rebuilt and redeployed.

Takeaways
Hopefully, this blog post helped you understand the importance of thinking cloud native when it comes to IoT development.
If you use Eclipse Hono for your IoT connectivity layer, for example, you automagically get a piece of infrastructure that is already instrumented to autoscale, should the number of devices connected to your backend require it.
Thanks to Eclipse Che, you can develop your IoT services in a controlled environment, that is already part of the same cluster where the rest of your IoT infrastructure and applications is already running.
Final words: don’t push it!
Now, I cannot conclude this blog post without a personal observation, and something I hope others have in mind as well.
Many moons ago, I used to teach people how to develop plugins for the Eclipse RCP platform – a truly great, highly extensible, framework. However, the platform being so modular, soon enough, you could end up turning everything into a plugin, just for the sake of having an “elegant” design. And when you think about it, microservices are very similar to Eclipse plugins…
Does it really make sense to isolate really tiny microservices in their own containers? For each microservice, what’s the overhead gonna be like to be maintaining its build system, access rights to the corresponding Git repository, configuration files, …?

You should absolutely have a cloud native strategy when it comes to building your IoT solution, but don’t overthink it! Your microservice architecture will likely emerge over time, and starting with a too small service granularity will just make things unnecessarily complex.
Please use the comments section below to share your thoughts on cloud native and IoT. I think this will be a hot topic for the near future, and I’m interested in hearing your views!
Final note: Shout out to Jens Reimann and Dejan Bosanac from Red Hat who’ve put a lot of work into the Hono part of the demo (running Hono on OpenShift, and putting together the demo app publishing electricity consumption information). Thanks also to Eugene Ivantsov for helping out with getting a proper Eclipse Che stack for JavaScript set up.