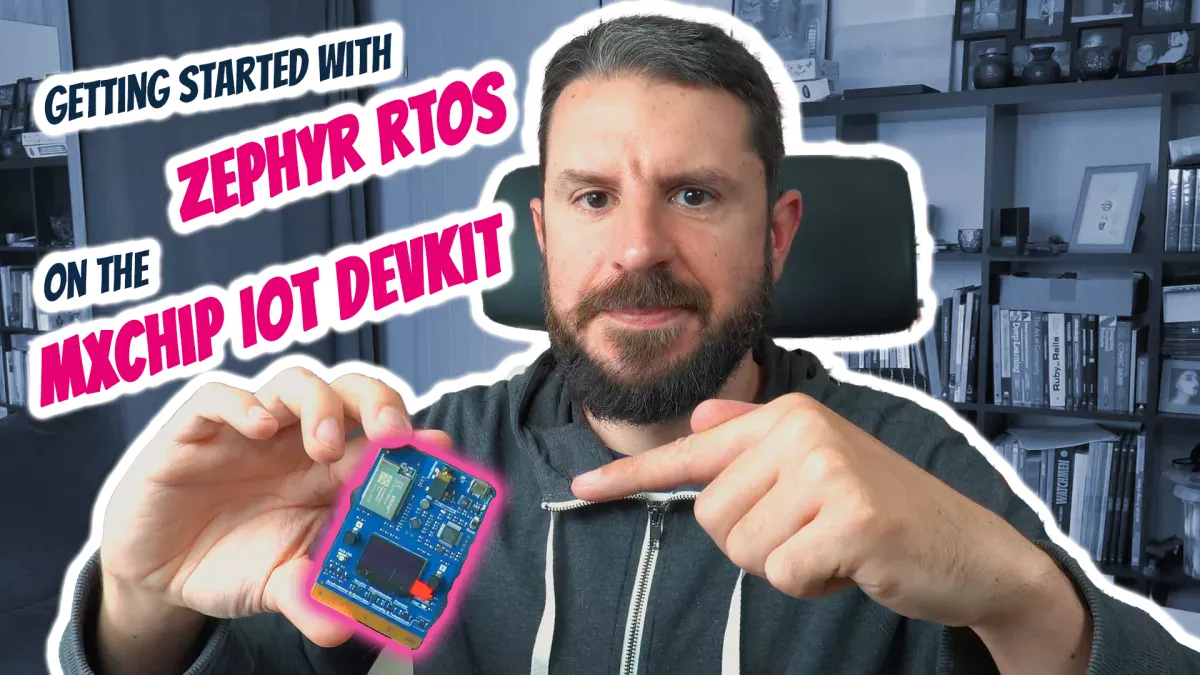
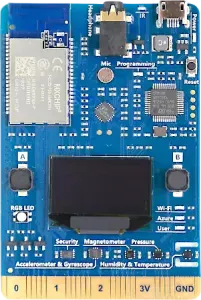
As you may have read in the latest edition of my Zephyr Weekly Update, Zephyr RTOS now has support for the very popular MXChip AZ3166 IoT DevKit!
There are tons of IoT developer kits out there, but this one is particularly interesting to me as it’s been used by Microsoft for many years as one of the reference platform for the Azure IoT demos and tutorials. Many folks all around the world have had the opportunity to play with it, and I thought adding support for it in Zephyr RTOS would be a good opportunity to give everyone an excuse to learn more about Zephyr by directly getting their hands dirty.
I have just posted the following short video on my YouTube channel, and I encourage anyone interested in dusting off their MXChip DevKit to watch it and give the Zephyr Getting Started a try 🙂
If you have any questions or need help, feel free to leave a comment below or on the video!
If you enjoyed this article, don’t forget to subscribe to this blog to be notified of upcoming publications! And of course, you can also always find me on Twitter and Mastodon.
Welcome back to what I hope is starting to become part of a weekly routine for some of you. It certainly is for me 🙂 There are some very cool news this week, with the addition of a new retention mechanism, which I’ll explain in more details below.
I am also really excited to see that the popular AZ3166 MXChip IoT DevKit is now supported in Zephyr. It’s a developer kit that people familiar with Microsoft Azure IoT will certainly recognize, and I am looking forward to seeing what people will do with it now that it can be used with Zephyr!
The new retention system provides a robust and efficient way for applications to manage data that must be retained while the device is powered, without having to rely on non-volatile storage (64f4404).
The retention system API enables applications to read and write data to memory areas or devices that retain information while the device is powered. This functionality allows sharing information between different applications, or within a single application without losing state information upon device reboot.
Data Integrity
To ensure the validity of retained data, the retention system offers the option to use a magic header that can be used to verify if the front of the retained data memory section contains a specific value. An optional checksum of the stored data can also be appended to the end of the data, providing further validation.
Retained Data Partitioning
Data stored through the retention system can be partitioned into multiple distinct areas, making it easier to manipulate only the fields you need instead of a large binary blob.
There is extensive documentation about this new feature, so I definitely encourage you to check it out. Thanks Jamie for all the hard work on this!
New boards & shields
MXChip AZ3166 IoT DevKit
Like I mentioned in the intro, the MXChip AZ3166 IoT DevKit is now supported (ce339e3). It’s a board that many people familiar with the Microsoft Azure IoT ecosystem will not only recognize, but also likely already have somewhere in a drawer. If that sounds like you, I would definitely like to encourage you to give Zephyr a try, the Getting Started Guide is the best way. I am working on a short video that should make things even easier for you. Please let me know about your experience in the comments, if you give it a try!
Note: the Wi-Fi module is not supported at this point, but contributions are welcome to propose an integration of the proprietary driver.
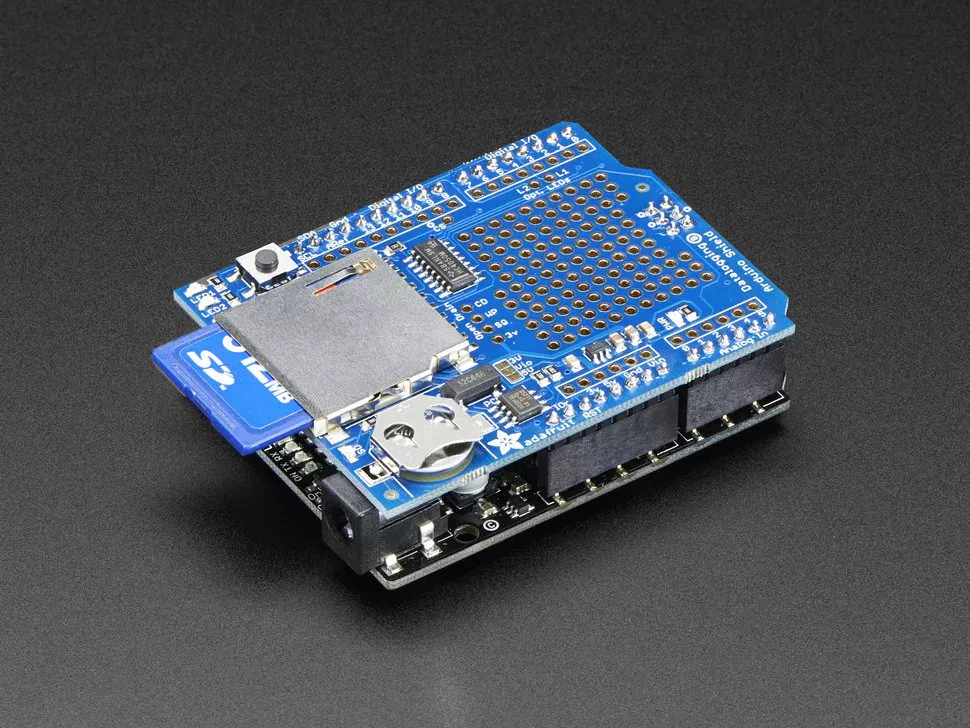
Adafruit’s Data Logger Shield is now supported (d4d8580). This shield provides an SD card slot and a real-time clock (RTC) for Arduino-compatible boards. The RTC chip it contains is the NXP PCF8523, for which a driver was contributed this week too.
Incremental ADC support (IADC) support has been added for Silicon Labs EFR32BG27 SoC (0417d38).
Added support for STM32U595 and STM32U599 with basic peripherals (a0ad7b7).
Bluetooth
PAwR Advertiser and Sync Support
A typical application for BLE PAwR is electronic shelf labels (ESL). Image credit: Dominic Alves.
The recently released Bluetooth 5.4 specificationintroduced the notion of Periodic Advertising with Responses (PAwR), a feature that allows Bluetooth Low Energy devices to perform energy-efficient, bi-directional, communication in a large-scale one-to-many topology. A typical application is electronic shelf labels (ESL).
As of this week, it’s now possible to use the PAwR Advertiser and Synchronization features (9021e2f, 95bc5cf). Support for Periodic Advertising Connection Procedure has also been added (PR 56374).
I encourage you to look at the codes samples (one for advertising, one for synchronizing, and the connection procedure too) to get more familiar with the functionality and how to use it in Zephyr.
Drivers
A new driver for the Raspberry Pi Pico’s Programmable I/O (PIO) has been added (5abb1b1). PIOs can be used to implement custom peripheral interfaces or offload real-time tasks from the main processor. I like to think of it as a tiny FPGA that you can program using an assembly language, which describes the state machine dictating the behavior of your I/O pin. This, for example, would blink an LED attached to the pin:
.program hello
set pindirs, 1
loop:
  set pins, 1 [31]
  set pins, 0 [31]
  jmp loop
In order to illustrate how to use PIO for more complex/useful scenarios, a sample has been created that shows how to implement UART RX and UART TX pins over PIO. See example here, and driver here.
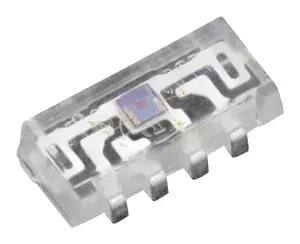
Vishay VEML7700 Ambient Light Sensor
The Vishay VEML7700 Ambient Light Sensor is a high accuracy ambient light sensor with an I²C interface (a665fc0). It has 16-bit of dynamic range and can perform ambient light detection from 0 to 120 klx.
New Incremental ADC (IADC) driver for SiLabs Gecko (0417d38). The incremental architecture uses oversampling to allow applications to trade speed for higher resolution (but it doesn’t look like oversampling is supported in the current implementation of the driver).
New driver for the NXP PCF8523 Real-Time Clock (RTC) (11fc5d0). The PCF8523 is a CMOS Real-Time Clock (RTC) and calendar optimized for low power consumption.
New driver for the Motorola MC146818B RTC (bfeb5043ac).
Texas Instruments INA3221 Current/Voltage Monitor (3746074). The INA3221 can sense current on up to 3 channels in a 0-26V range.
Updates to existing drivers
The SDHC driver has been updated to support different CPOL/CPHA SPI clock modes (1929eb3). This helps deal with SD Cards that require the clock to switch to low when not active.
The Semtech SX126x LoRa driver has been updated to support fine-grained Power Amplifier (PA) configuration for the STM32WL series (e78e8d7).
The hwinfo driver for all ESP32 boards has been updated to implement the get_reset_cause function (9eef799).
Miscellaneous Updates
Added Power Delivery (PD) Source Support to the USB-C Stack (see documentation).
A new MCUboot shell command (serial_recovery) has been added. It allows entering MCUboot’s serial recovery mode when the retention subsystem is used.
A new script has been added to generate coverage reports for the Zephyr’s BabbleSim-based tests (ad3c390).
New DT_ANY_INST_HAS_PROP_STATUS_OKAY macro. Given a Devicetree property name, it evaluates to 1 if any enabled instance of DT_DRV_COMPAT has the property or to zero if it hasn’t. (44ec128e8b)
To make first-time contributors feel welcome and encourage their continued involvement in the Zephyr project, a new GitHub action has been added that sends a greeting message to users when they open their first pull request or issue. I certainly encourage you to try it out by taking the plunge of doing your first contribution, if you’ve never contributed to the project!
As always please feel free to jump in with your thoughts or questions in the comments below. See you next week!
If you enjoyed this article, don’t forget to subscribe to this blog to be notified of upcoming publications! And of course, you can also always find me on Twitter and Mastodon.
Catch up on all the editions of the Zephyr Weekly Update:
Happy Friday! As you can imagine, putting this weekly digest together is rather time consuming, but luckily I am regularly improving the scripts I’m using to do the heavy-lifting of flagging noteworthy commits! This week, I added something that helps me notice who’s got their first contribution(s) merged. Therefore, it is my great pleasure to send a big shout-out to Andrew, Brandon, Jackie, Kenny, Krzysztof, Laurentiu, Patryk, Roman, Sreeram, and Theo!
The nRF9161DK from Nordic is an upcoming single-board development kit for evaluation and development on the nRF9161 SiP for LTE-M and NB-IoT, and it’s already supported in Zephyr (4bbd91a908) 🙂
Initial support for the Silicon Labs EFR32BG27 BRD2602 board has been introduced (df7f10422e). This board is designed for ultra low-power scenarios (think: coin-cell powered).
The IT82XX2 is a 32-bit RISC-V microcontroller suitable for building embedded controllers, just like what you would find in a laptop or a smartphone. Support for the SoC as well as evaluation boards from ITE Tech, Inc. has been added this week (96df7bb83344250a9e67). More info in the documentation too.
The NPM1300_EK shield is an evaluation kit for the nPM1300 Power Management Integrated Circuit (PMIC). (046dda0fa1). A companion sample application will help you get your ahead around the kind of functionality the PMIC provides. If you’re not familiar with what a PMIC is, think of it as a way to programmatically control how you want to power the different peripherals of your system. You might hook up your LCD display backlight to it, so that you can actually control its voltage based on some conditions (e.g. dim the backlight when it gets darker, or when you’re running low on battery).
Wi-Fi support has been added to the Espressif ESP32S3 SoC (a6c8c6e546).
Drivers
Just like in previous weeks, a bunch of drivers made it into the upstream repository. I am always excited to discover new kinds of sensors–this time a color sensor 🌈–keep getting added 🙂
A new Bluetooth HCI driver for SiLabs BLE has been added (4a614de289).
Two new I2C drivers have been introduced this week:
The nPM1300 Evaluation Kit mentioned earlier wouldn’t be incredibly useful withouth the associated driver for the actual PMIC! (d1e201ccf6)
The ADT7310 temperature sensor from Analog Devices is a high accuracy digital temperature sensor with up to 16-bit ((0.0078°C) resolution (b8244fdabd)
New driver for Würth Elektronik WSEN-PADS absolute pressure sensor (6789c0d400). Such a sensor can be useful in e.g weather stations or wearables, as you can use it to measure not only barometric pressure but also altitude.
And if you need a differential pressure sensor, then Würth Elektronik has you covered as they also contributed a driver for the WSEN-PDUS (73ed8ccb5f)
The Bluetooth Shell has been extended to improve the output of BLE scan data (ddf518e706).
Miscellaneous Updates
If you’re using Zephyr with Nordic chipsets, you’ll be interested in hearing about the added support for Nordic’s new nRF Util, which helps you program, recover, erase, etc. your device.
The network connectivity manager API has been updated to to generically configure and trigger post-admin-up associate/connect operations on network interfaces that support it (7c4397ae79).
As always please feel free to jump in with your thoughts or questions in the comments below. See you next week!
If you enjoyed this article, don’t forget to subscribe to this blog to be notified of upcoming publications! And of course, you can also always find me on Twitter and Mastodon.
")